Shelters
Design
Requirements for the design, manufacture and installation of embellishments
Good design
See the following corporate documents to identify relevant project design requirements:
Sunshine Coast Planning Scheme regulates the way land, buildings and structures are used and developed on the Sunshine Coast.

Sunshine Coast Design contains 10 design principles that guide good project planning and design outcomes, that are appropriate for the Sunshine Coast.
The LIM provides further overarching design advice, refer:
- Introduction and Design Principles - e.g. sustainability, CPTED, accessibility
- Preliminaries - environmental management, tree sensitive design and site set up.
Embellishment requirements
- Universal access.
- Comfortable and suitable for the average person.
- See 'Positioning' and 'Equal access' sections for the corresponding LIM category.
- Made from materials that will be durable and can be suitably protected from exterior elements, such as salt spray and UV exposure.
- Robust and sturdy to withstand constant public use and be resistant to vandalism.
- Fixings are to be 316 marine grade stainless steel (unless otherwise stated).
- Tamper proof fixings should be used
- Graffiti protection coatings applied (where applicable)
- Fire retardant (where applicable).
- Warranties should be as listed below.
- Easily repairable or replaceable.
- Sourced locally and use standard fittings.
- Reputable suppliers should be used who keep a supply of stock parts on hand for the life of the product.
- Use sustainable materials, although sustainability needs to be considered over the lifetime of the embellishment.
- Install on paved, concrete or other hard surfaces (where applicable).
- Manufactured to engineering specifications (where applicable).
- See the 'Standards' section for the corresponding LIM category.
Warranty and asset life
Product/embellishment | Warranty (minimum) | Asset life (typical useful life) |
Shelter | 20-25 years | 25 years 2 |
Source 2: Sunshine Coast Council Asset Management Plan 2017/18-2022/23 – Parks and Gardens (figure based on current data, subject to change).
Shelters
Once the location of the shelter has been decided, based on the Environment and Liveability Strategy (ELS) and Recreation Parks Plan (RPP) guidance, consider the appropriate embellishment level to suit the selected site.
Overall design considerations:
- All open spaces should include universal access (e.g. provide a pathway, and design to allow movement around furniture).
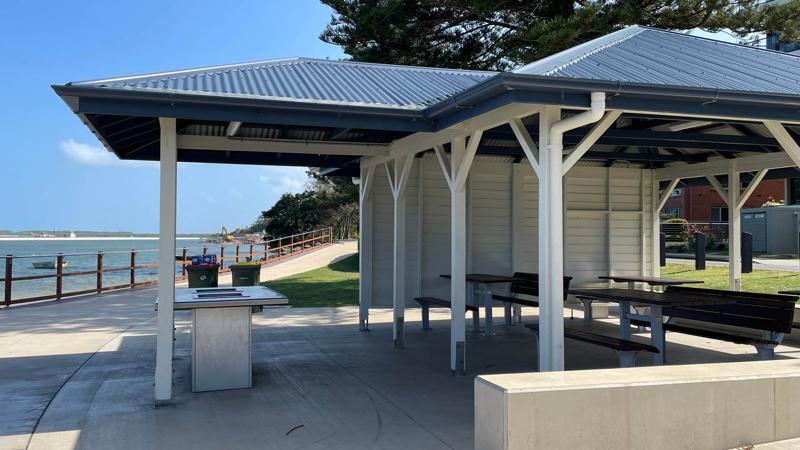
- Shelters are prominent structures in parks and open spaces. They provide shade and protection from skin damage due to exposure to ultraviolet radiation (UVR). Shelters also provide some protection from weather events such as wind and rain.
- Shelters facilitate social interaction and provide the opportunity for social inclusiveness.
- Provide site specific shade modelling (shade diagram) for shelters. Refer LIM Shade sails for shade requirements.
Level of embellishment
The level of shelter embellishment should be as follows:
- Basic shelter – meets the basic function, with minimal embellishing.
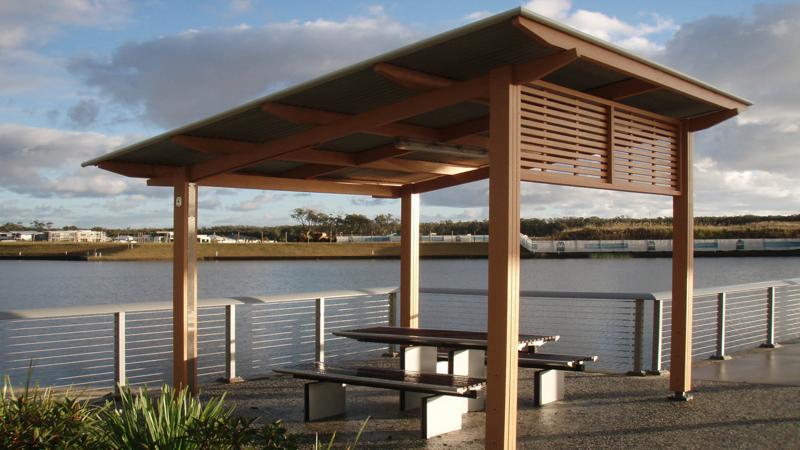
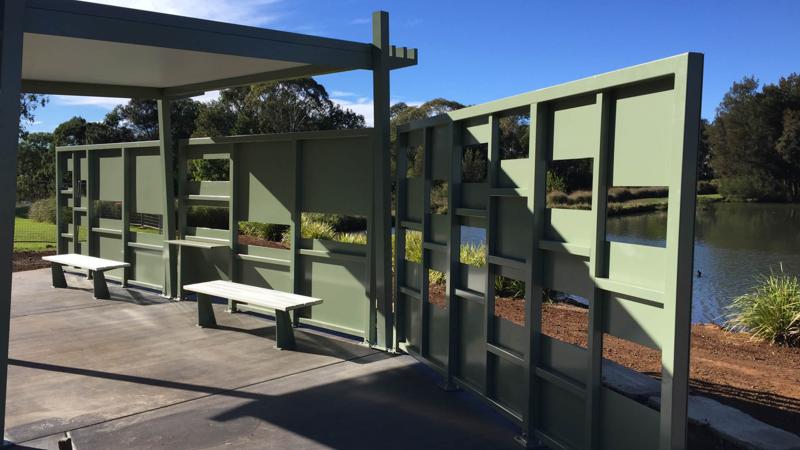
- Embellished shelter – may be more responsive to the local precinct character, architecture or material palettes of the site and surrounds. They may also respond to a specific purpose/design. As an example, an embellished shelter may have more intricate roof lines, guttering, shade slats, side panels and lighting. These shelters typically require more upkeep and maintenance, so care should be taken to ensure maintenance notes mentioned in this document are considered.
Certification
The following are required for shelter design:
- Compliance with all council building codes and the most recent version of the National Construction Code (NCC).
- Must meet or exceed (where appropriate):
- AS 1720.1-2010 Timber structures - Design methods
- AS 4100-1998 Steel Structures
- AS 4055-2012 Wind loads for housing
- AS 1170.1: 2002 (R2016): Structural design actions - Permanent, imposed and other actions.
- Must exceed Minimum Wind Classification standards.
- Geotechnical investigation may be required for a slab design and post/structure.
- Structural certification by an RPEQ (registered professional engineer of Queensland) is required.
- For all structures over 3.0 m in height, certification by a professional building certifier is required. The professional certifier will advise which forms are necessary. (e.g. Form 15 - Before construction, Form 12 - During construction, Form 16 - During construction at mandatory inspection stages, Form 21 - End of construction).
- Form 15 – Compliance certificate for building design or specification. Certifies a building design or specification will, if installed or carried out under the certificate, comply with relevant building laws
- Form 16 – Inspection Certificate/Aspect Certificate/QBCC Licensee Aspect Certificate. Certifies that an aspect of building work complies with the building approval and the relevant building laws.
For a more comprehensive list of applicable standards, please see LIM Shelters - Standards.
Shelter design
Sunshine Coast Council utilises the following three types of shelters:
- kit shelters
- custom shelters
- special purpose (bird hides, sports, etc.).
Kit Shelters
Kit shelters may be supplied in flat pack or pre-fabricated form.
- Shelters are designed, drafted and engineered to meet or exceed the minimum wind classification.
- Pre-engineered and certified to meet relevant building codes and Australian Standards.
- Pre-designed to meet or exceed National Construction Code and any other relevant Standards.
- Standardised shelter types across the region dependant upon the open space designation.
- Shorter construction times (potentially).
- Facilitates on-site safety and reduced on-site construction noise due to ready to assemble components.
Custom shelters

Custom shelters provide the opportunity to create design solutions that directly respond to the site.
- A design to suit unique site conditions and function.
- A design which can be more cost effective through recycling or re-lifing of previously used materials, resulting in minimised asset disposal costs.
Special purpose shelter
Special purpose shelters are designed specifically for a particular function such as bird hides or sports shelters. They may be procured in either kit or custom form.
Glossary of components
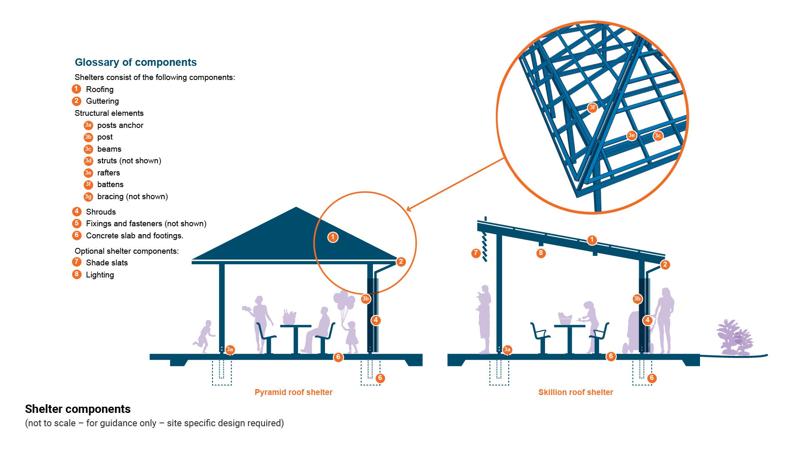
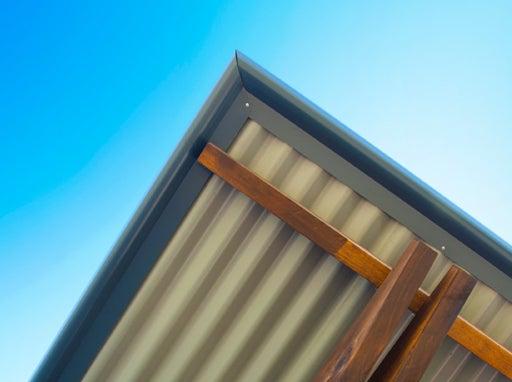
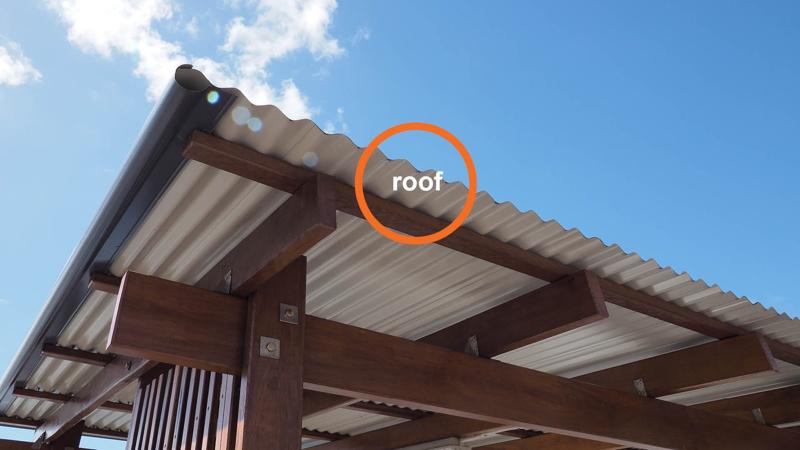
Roofing
Provides shade that allows solar protection in summer and protection from gentle rain events.
- There are a number of roof designs that may be used on shelters (see Table 1: Shelter roof types). Some of these are site specific, and are not suitable for all applications, therefore an engineer and/or architect may need to be consulted.
- Light coloured roofing materials reflect heat away from a shelter.
- Metal roof sheeting must be installed as per manufacturers’ recommendations. The following Colorbond (or equivalent) roof sheeting is available, including types for more demanding environments:
- Standard Colorbond (or equivalent) Steel is suitable for locations more than 600 m from breaking surf or 200 m from calm marine areas. Quality Class 5 fasteners (conforming to AS 3566) are recommended for this application
- Colorbond (or equivalent) Ultra Steel for areas more than 500 m from breaking surf or 100 m from calm marine areas. Class 5 fasteners (conforming to AS 3566) are recommended for this application
- Colorbond (or equivalent) Stainless Steel for coastal areas within 100 m of breaking surf. Stainless steel fasteners (conforming to AS 3566) are recommended for this application.
- Different roof sheeting types require specific fasteners. Unless noted otherwise, sheeting must be fixed with self-drilling, self-tapping marine grade 316 stainless steel screws with hex washer head. All fasteners are to be colour matched to the roof sheeting to be fastened (where possible).
- Plastic roof sheeting (e.g. polycarbonate) is NOT to be used due to:
- Weight bearing limitations. Where there is unapproved access, injury may result from falls.
- Ongoing maintenance and replacement costs arise due to vandalism and storm damage.
- Insulated sandwich panels may be used to alleviate heat under shelters.
- Roofing (without gutters) must be designed to drain onto an extended slab, and not on or near a footpath. The concrete slab must be extended a minimum of 500 mm beyond the lower side(s) of shelter roof (dependent on roof style) to prevent scouring of adjacent areas.
- A steeper pitched roof may require more than 500 mm slab extension to prevent scouring.
- Generally, east and west facing positions require wider overhangs to improve shade protection.
- Permanent roof anchors (harness points) should NOT be installed. When required, Council prefers the use of the temporary roof anchors, due to the ongoing testing requirements of permanent roof anchors.
See Table 1: Shelter roof types.
Table 1: Shelter roof types
Roof style | Features | Advantages | Disadvantages |
Gable (pitched or peaked roof) 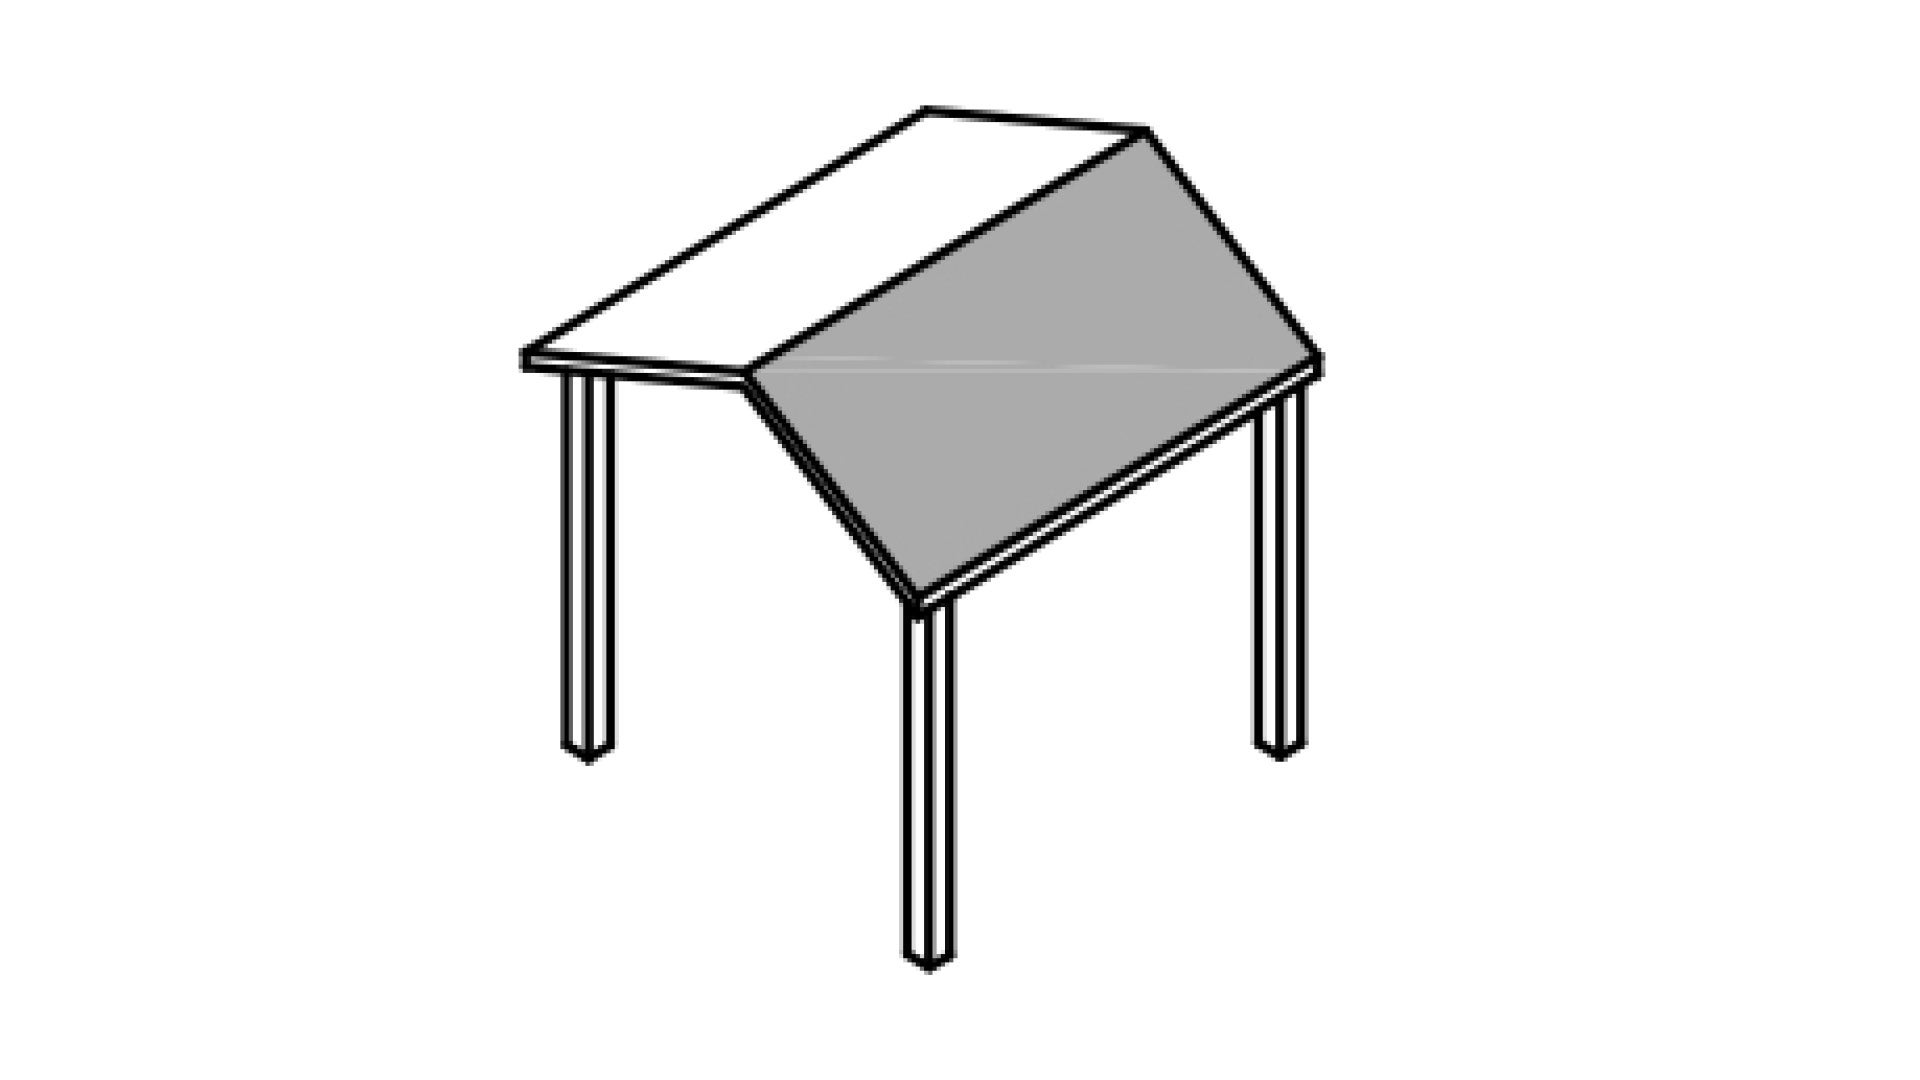 |
|
|
|
Box gable 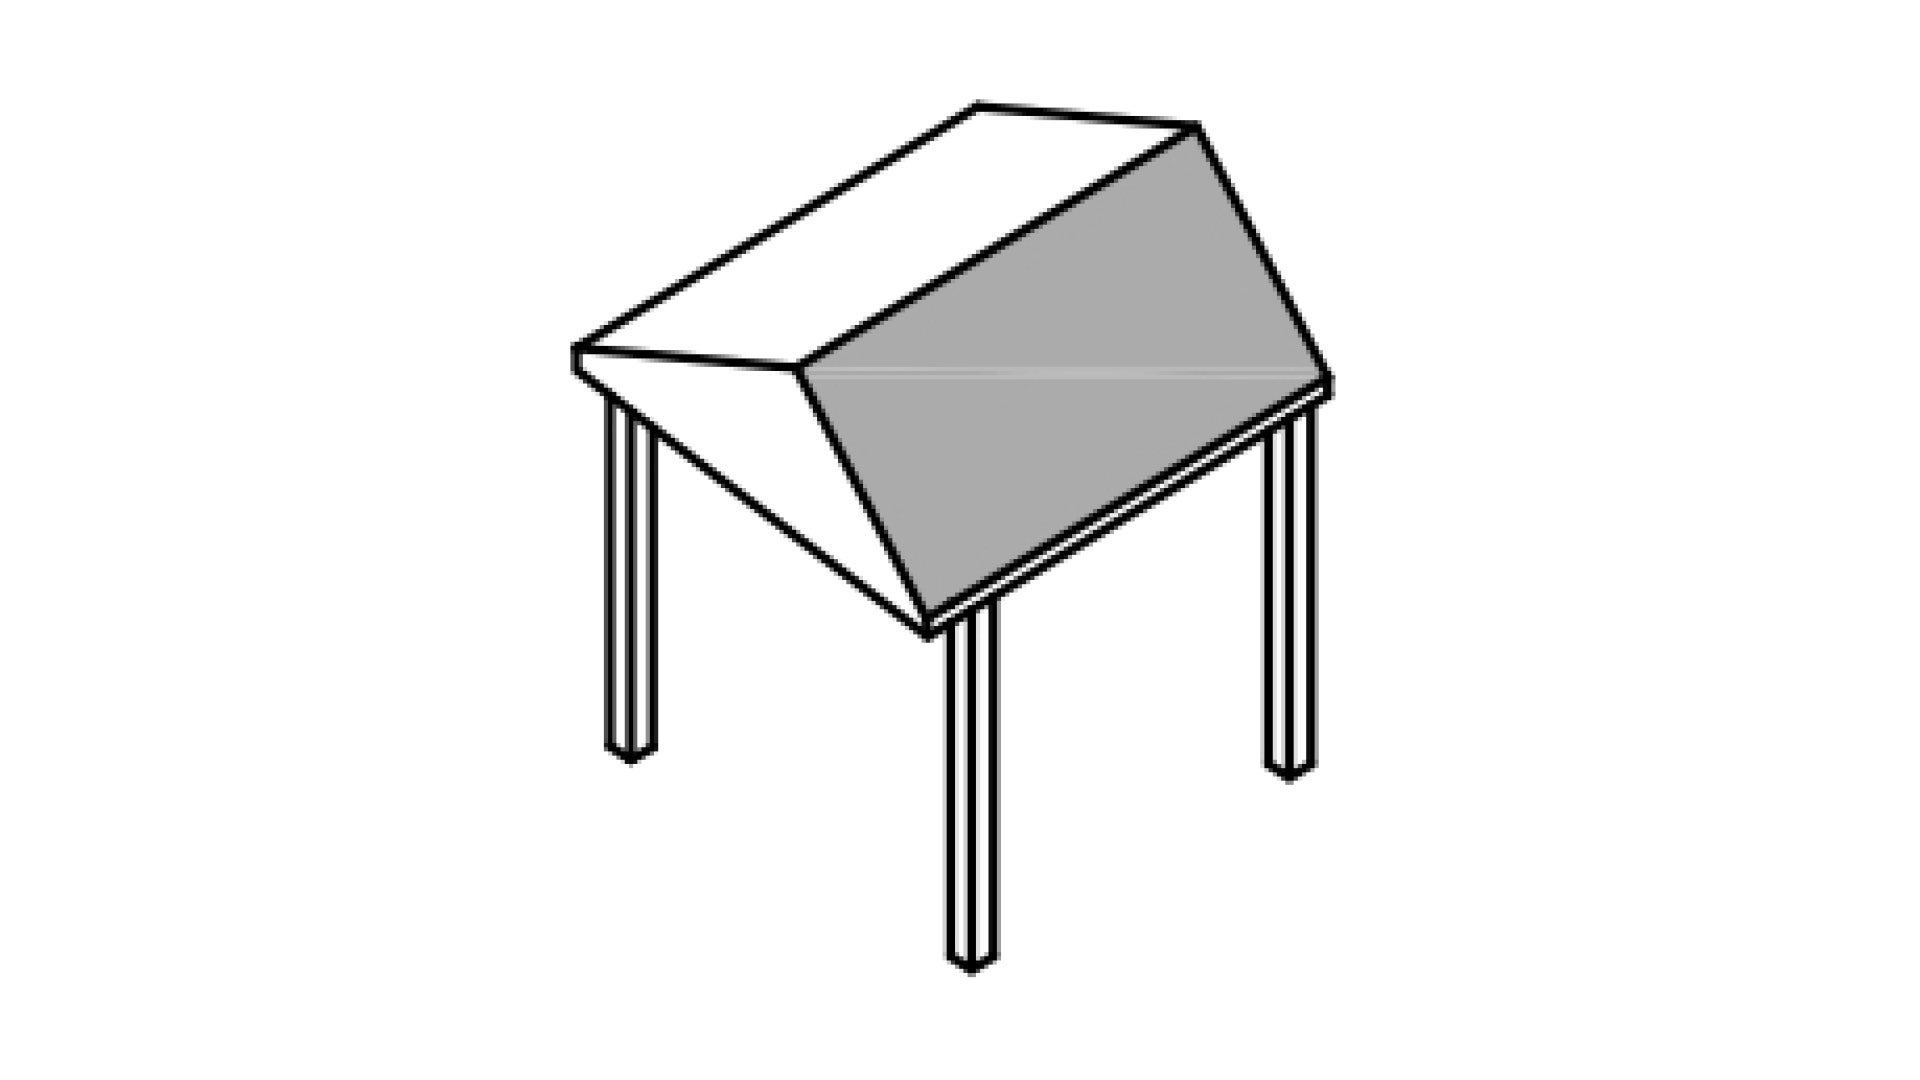 |
| As per gable roofs. | As per gable roofs. |
Hip 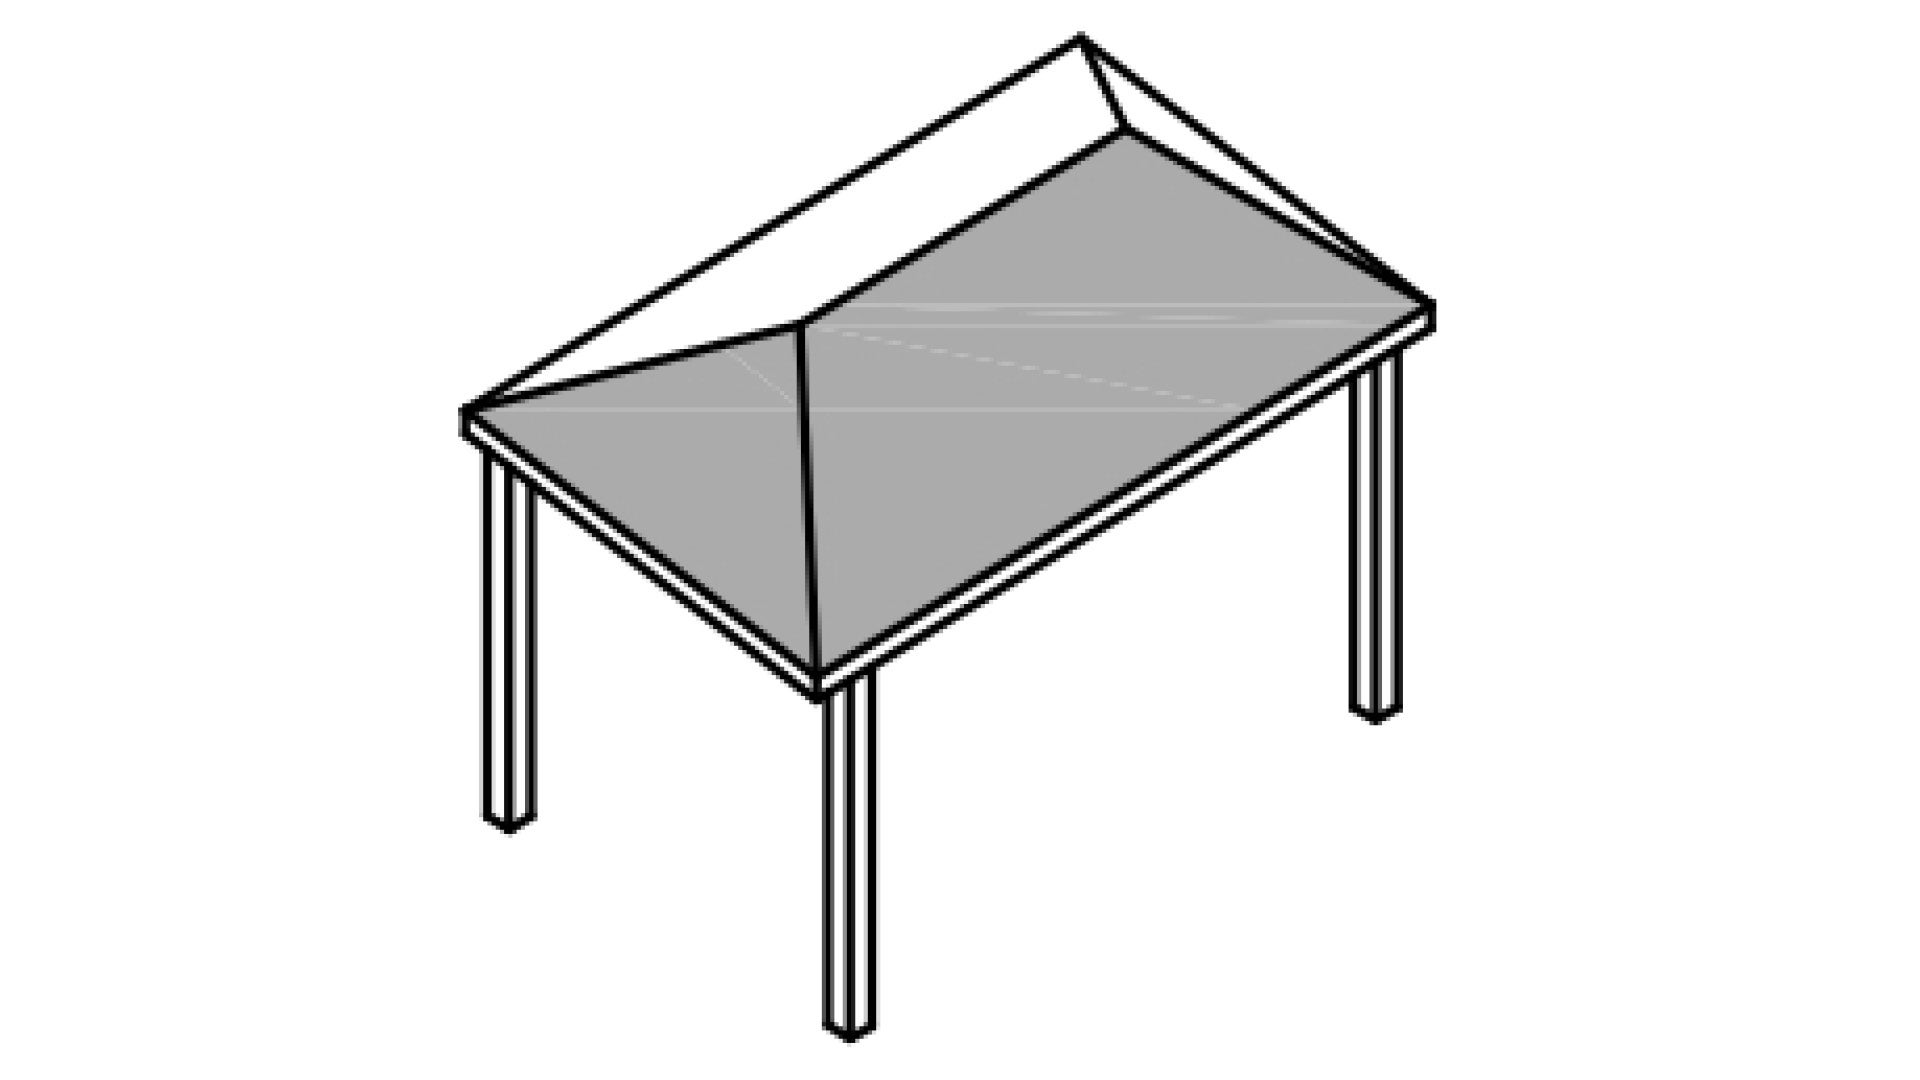 |
|
|
|
Gable hip or Dutch gable 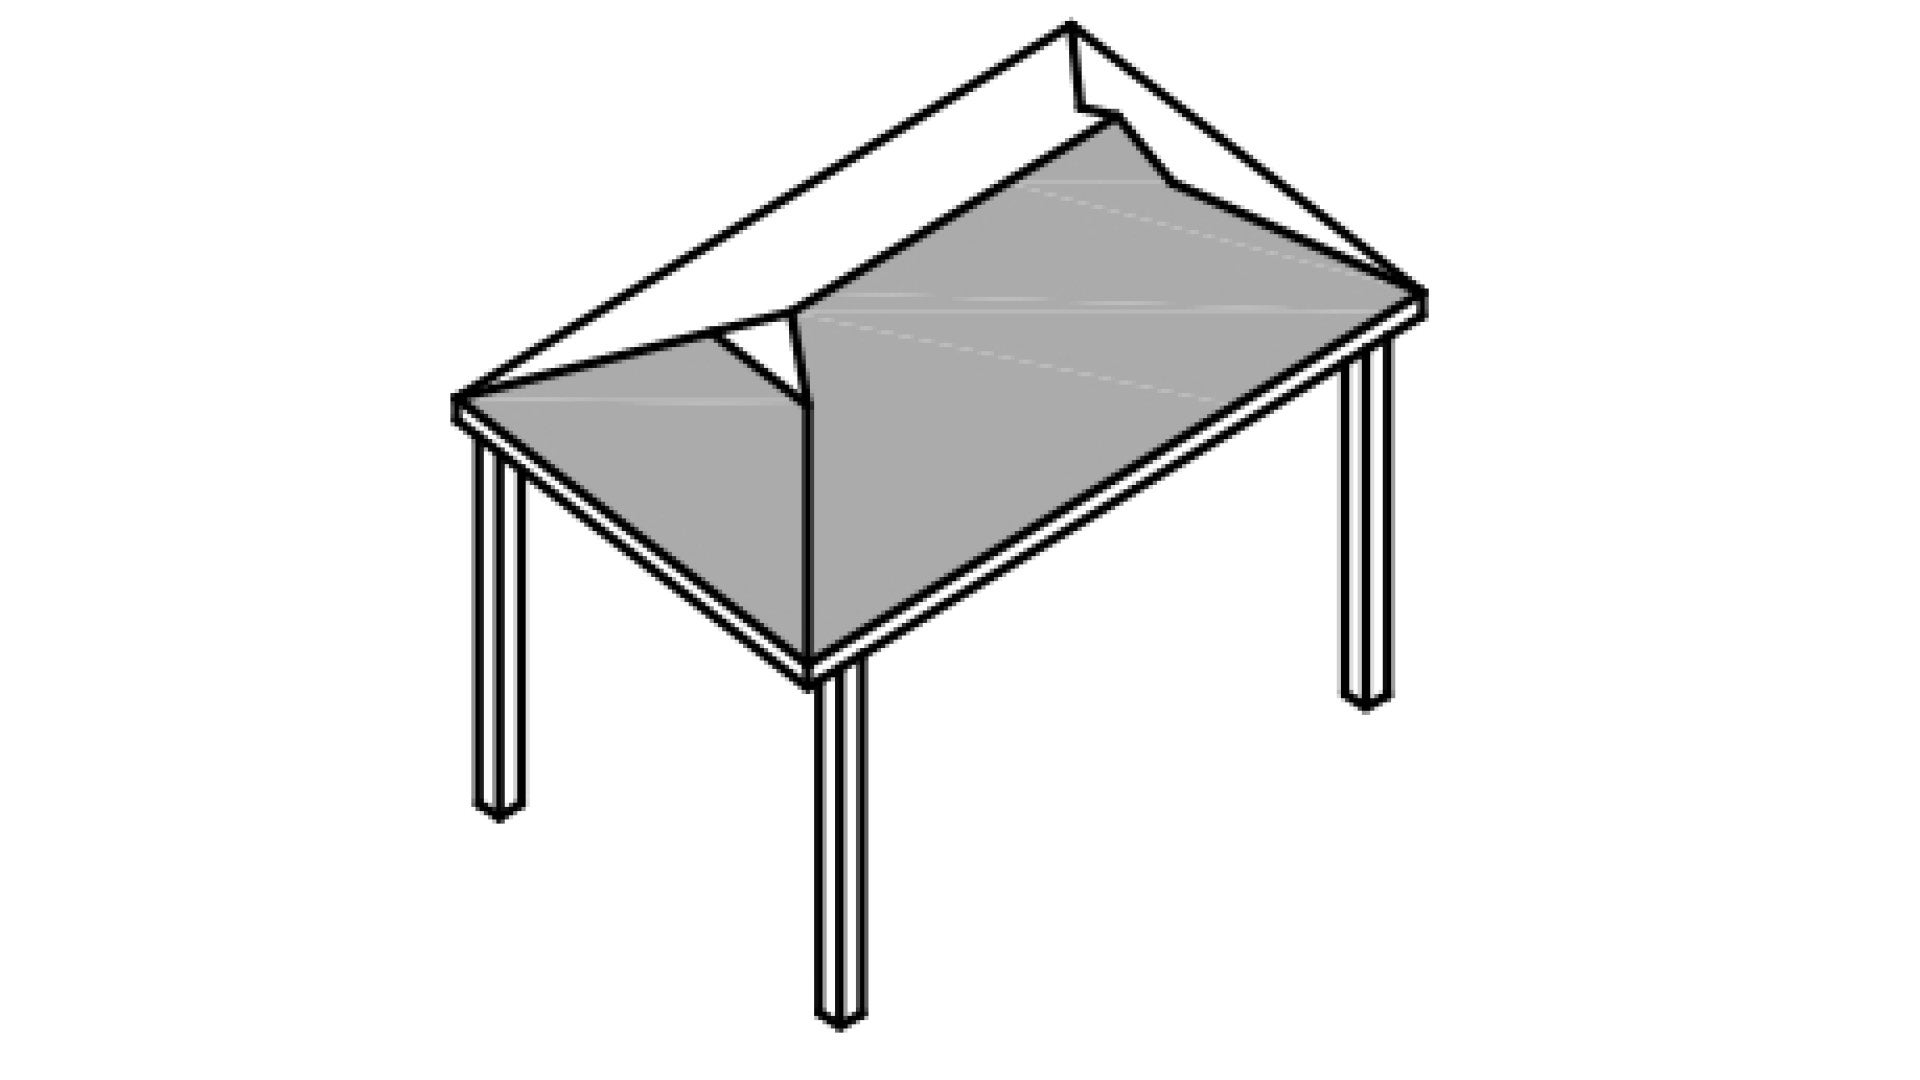 |
| As per hip roofs. | As per hip roofs. |
Pyramid  |
|
|
|
Pyramid with lean to 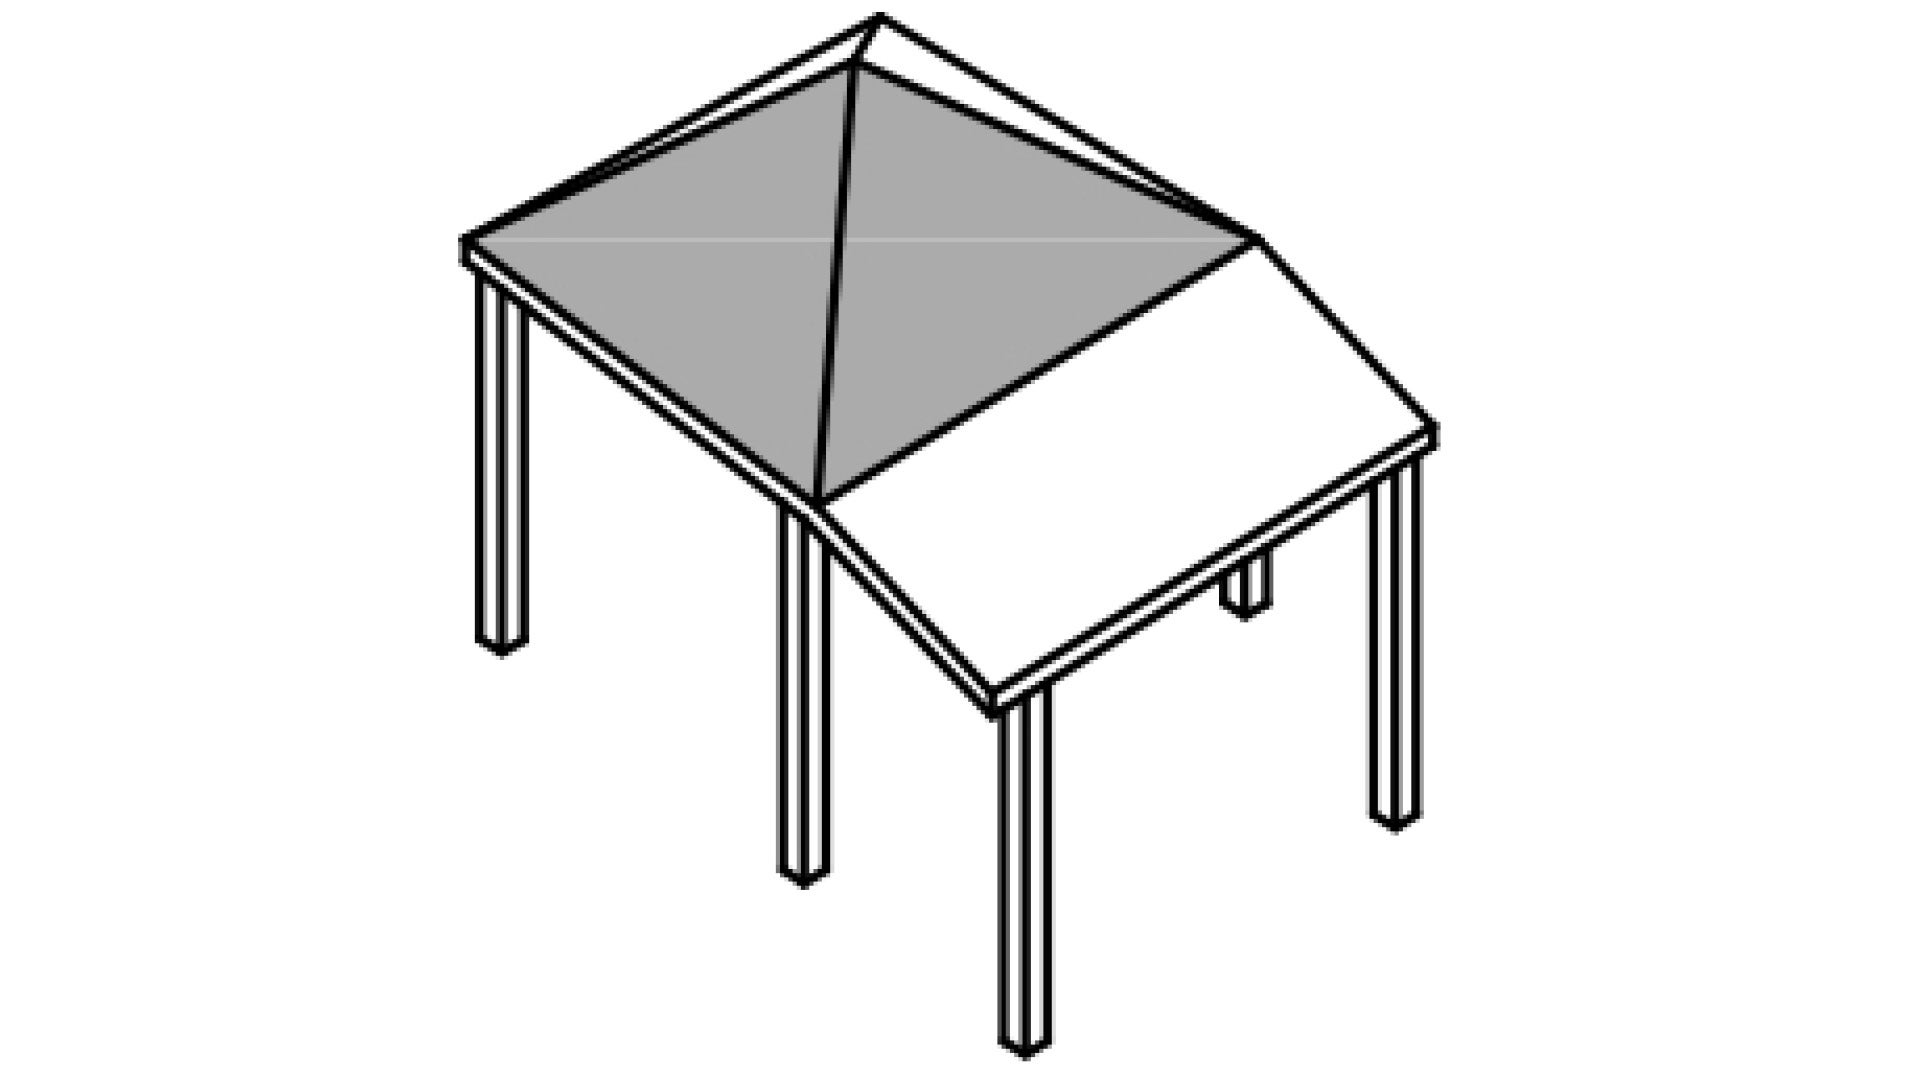 |
| As per pyramid roofs | As per pyramid roofs |
Skillion 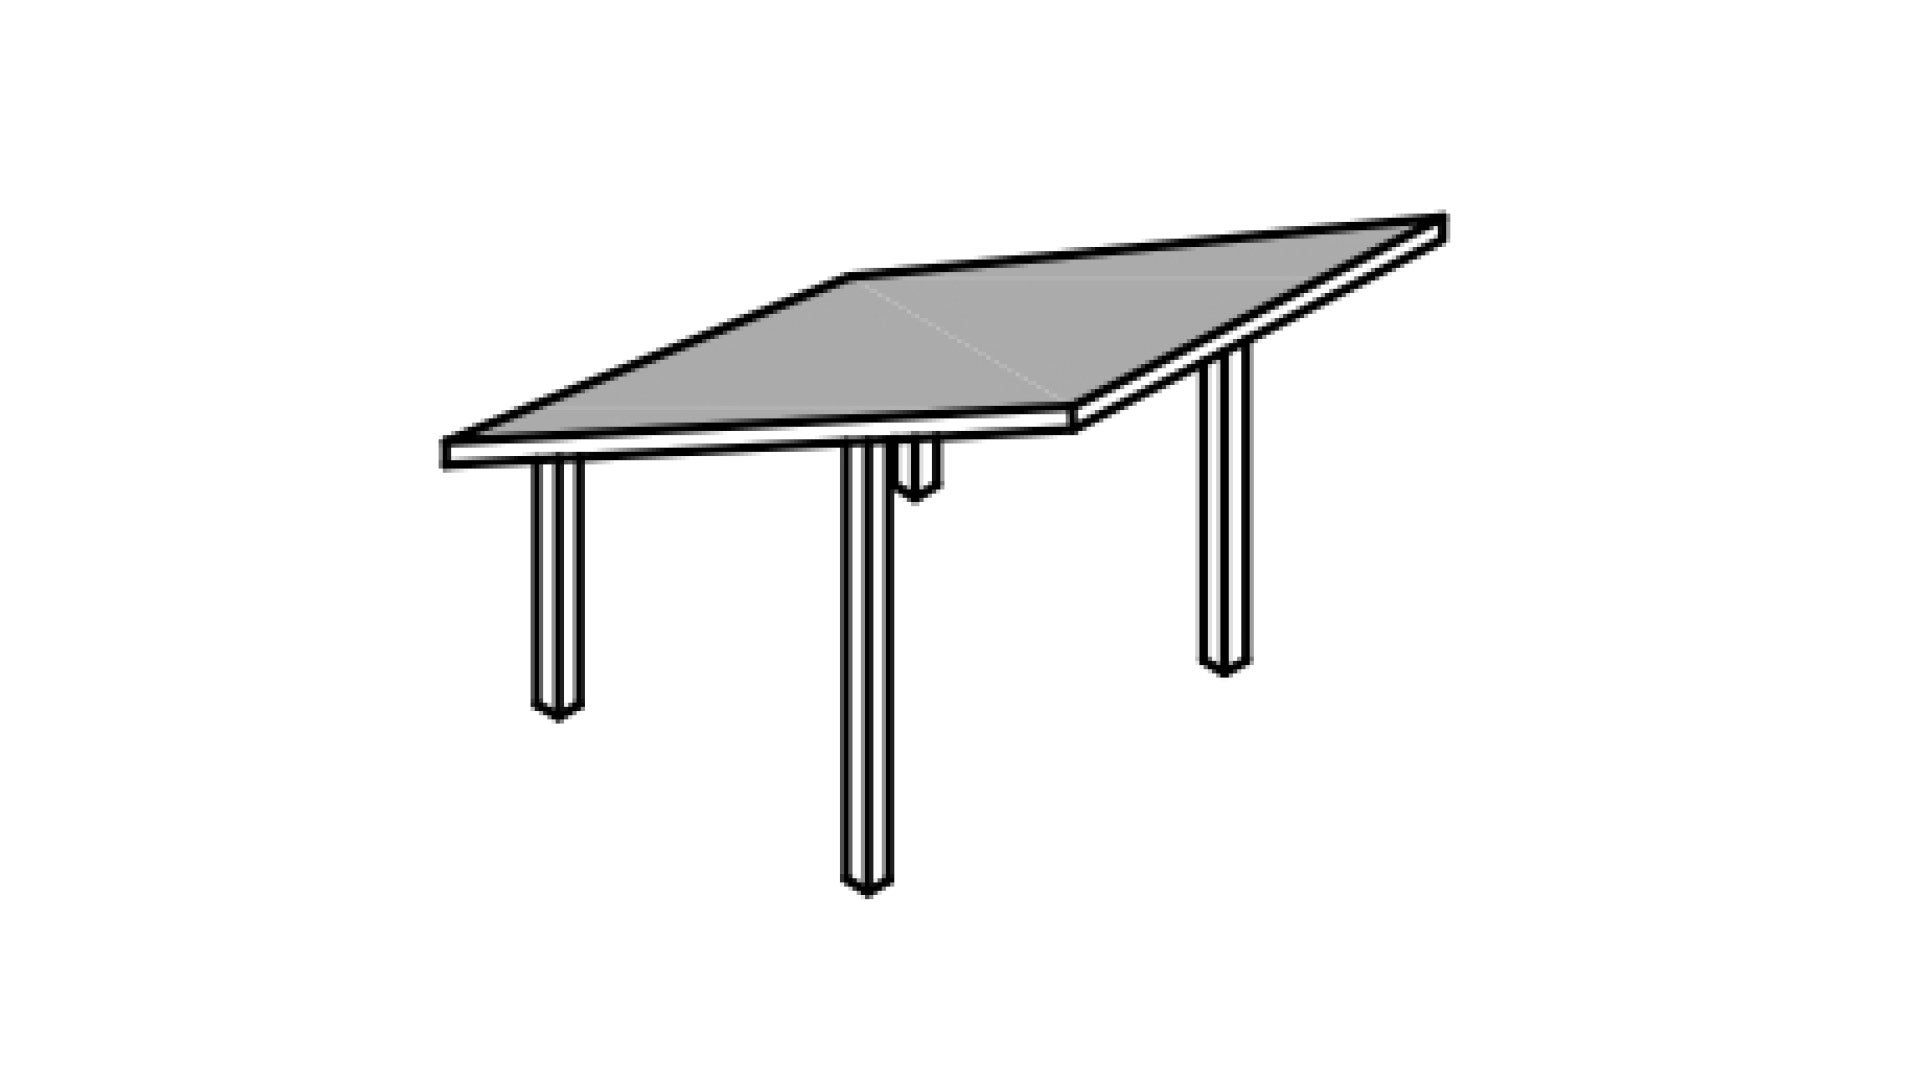 |
|
|
|
Flat 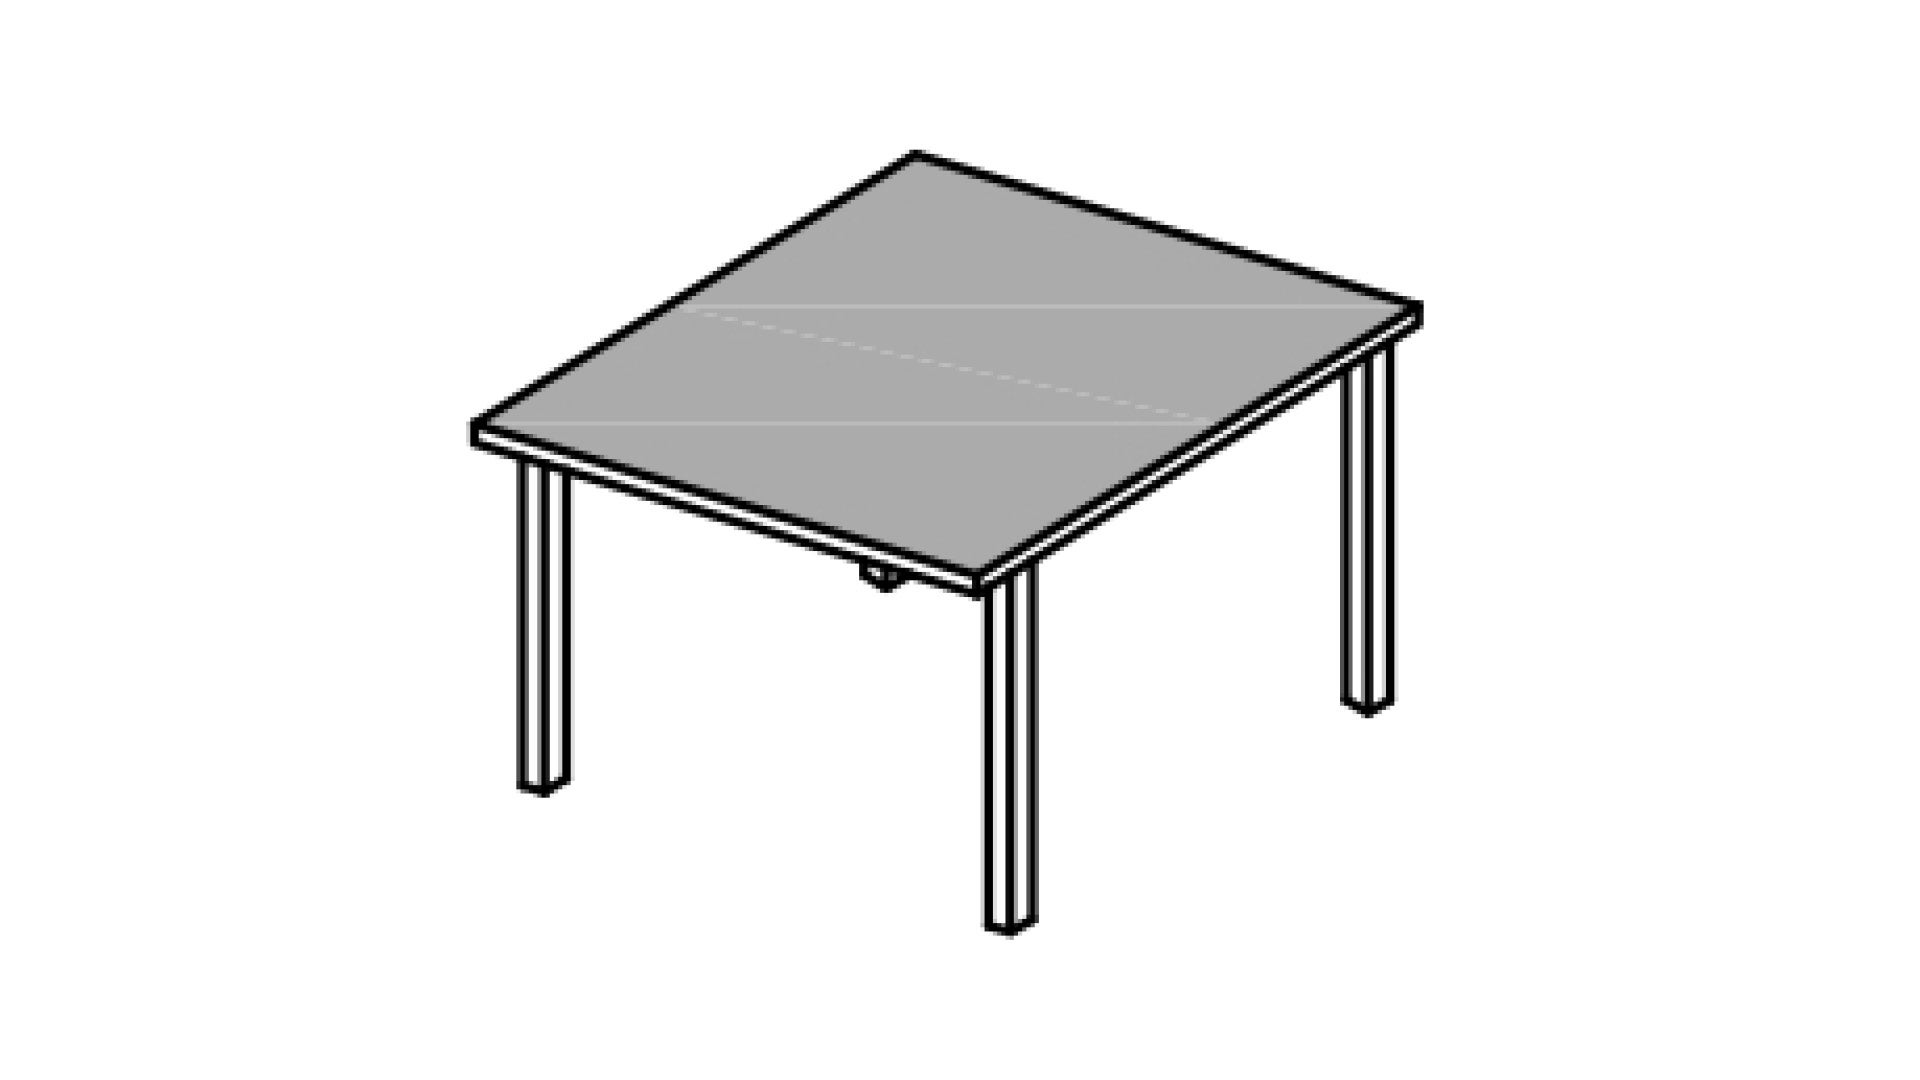 |
|
|
|
Butterfly roof 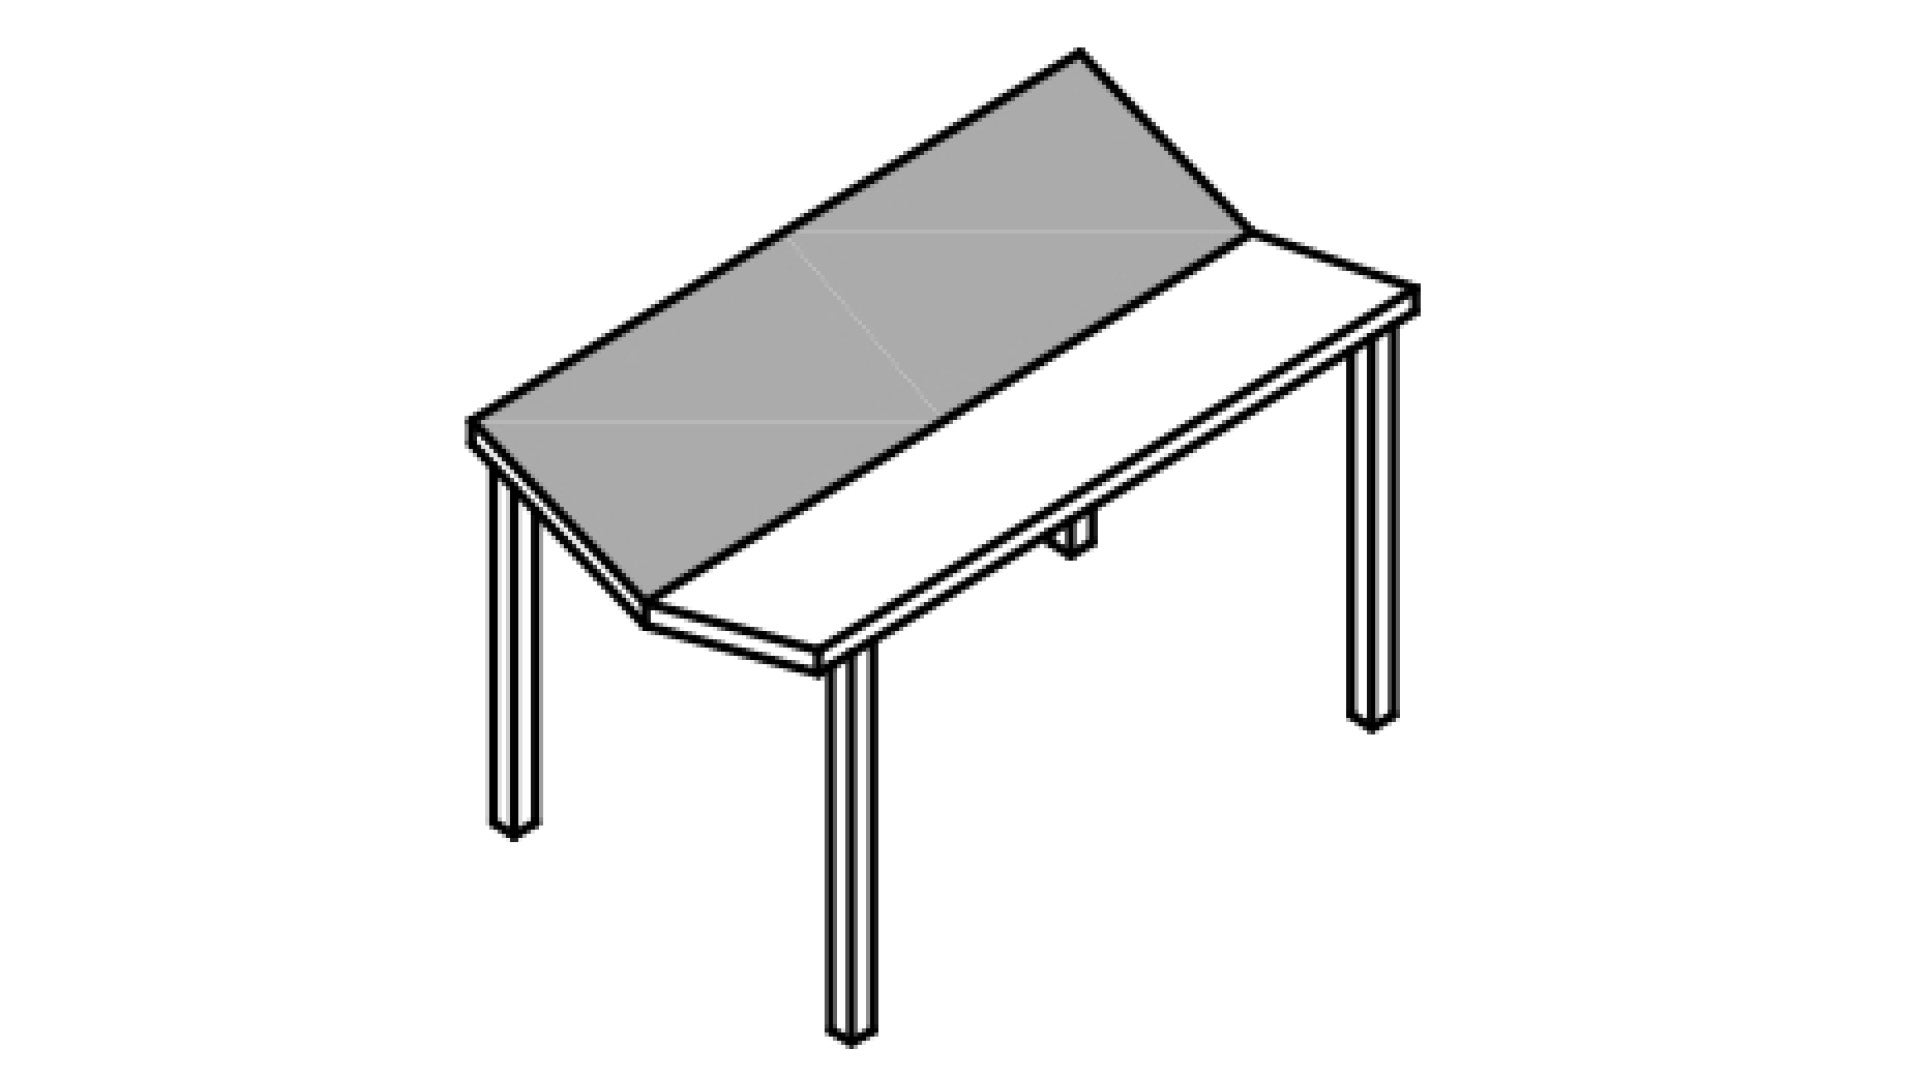 |
|
|
|
Gazebo 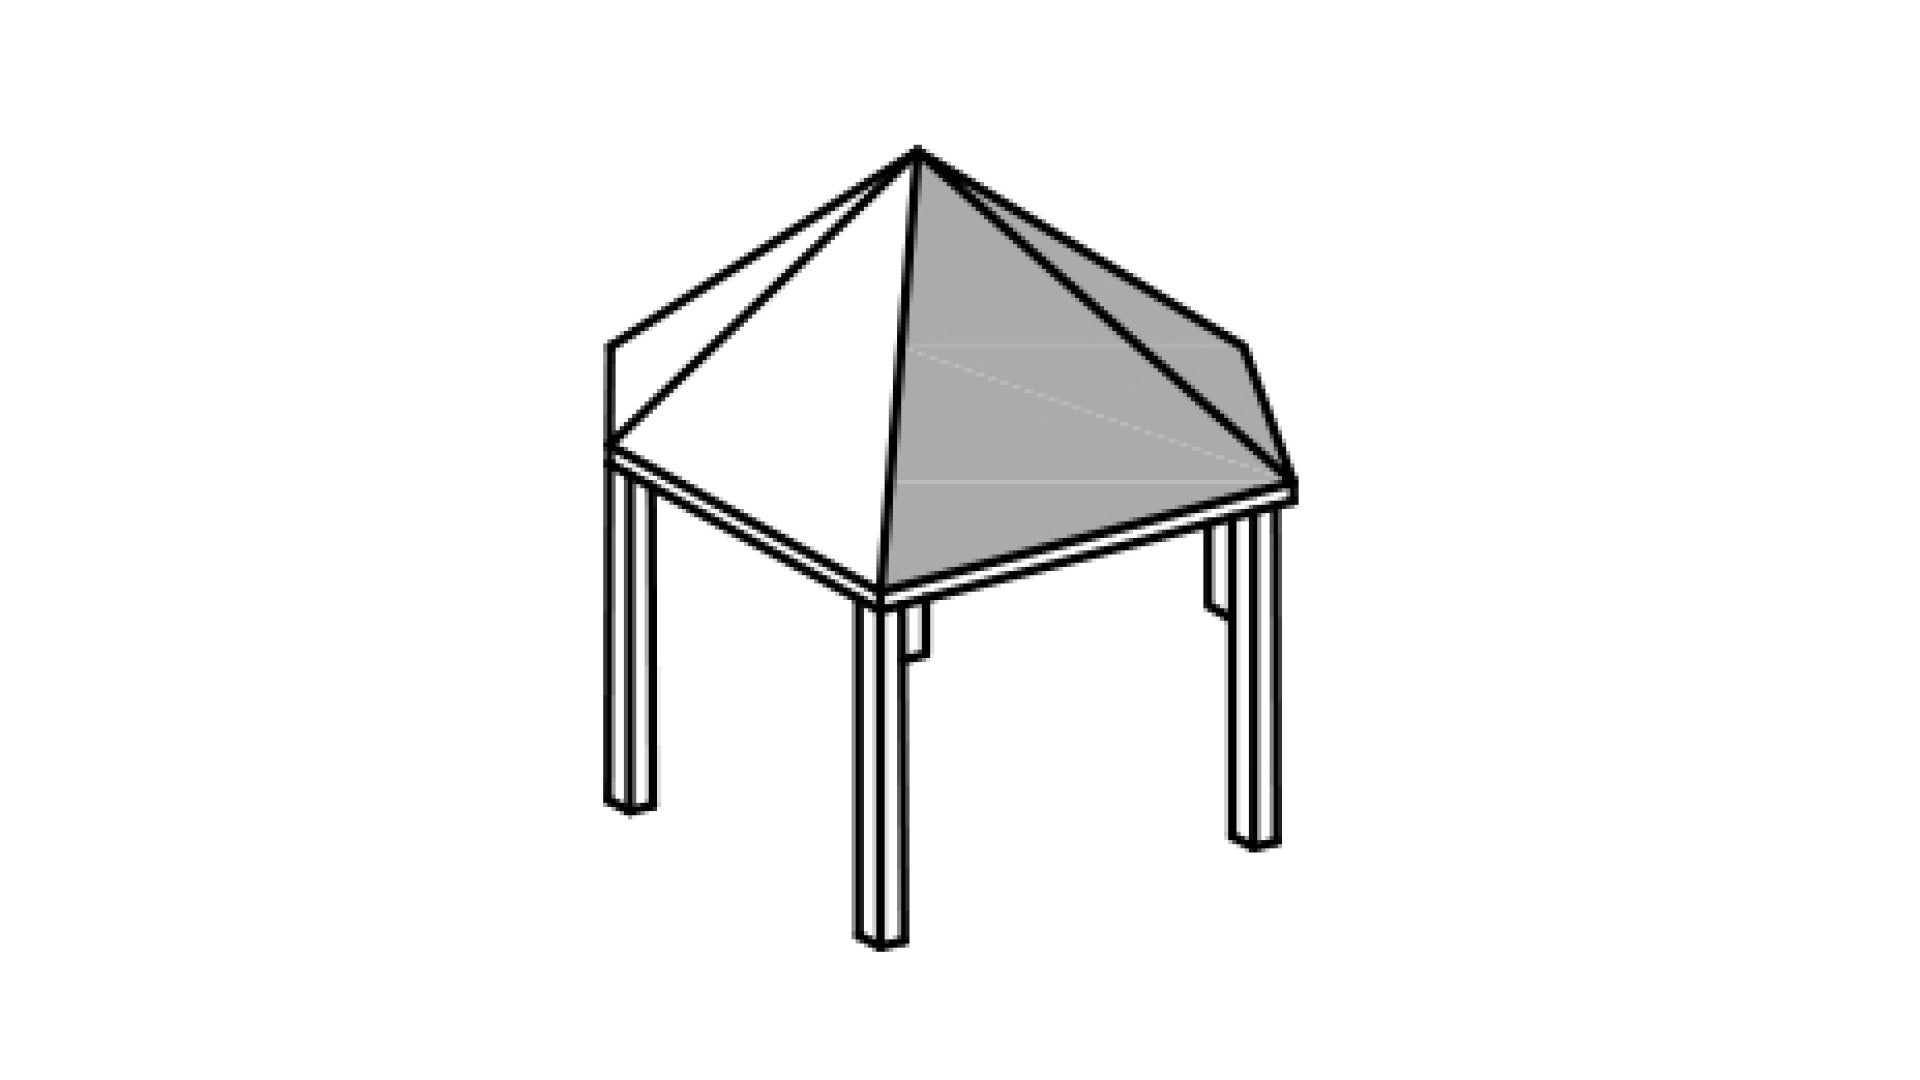 |
|
|
|
Cantilever 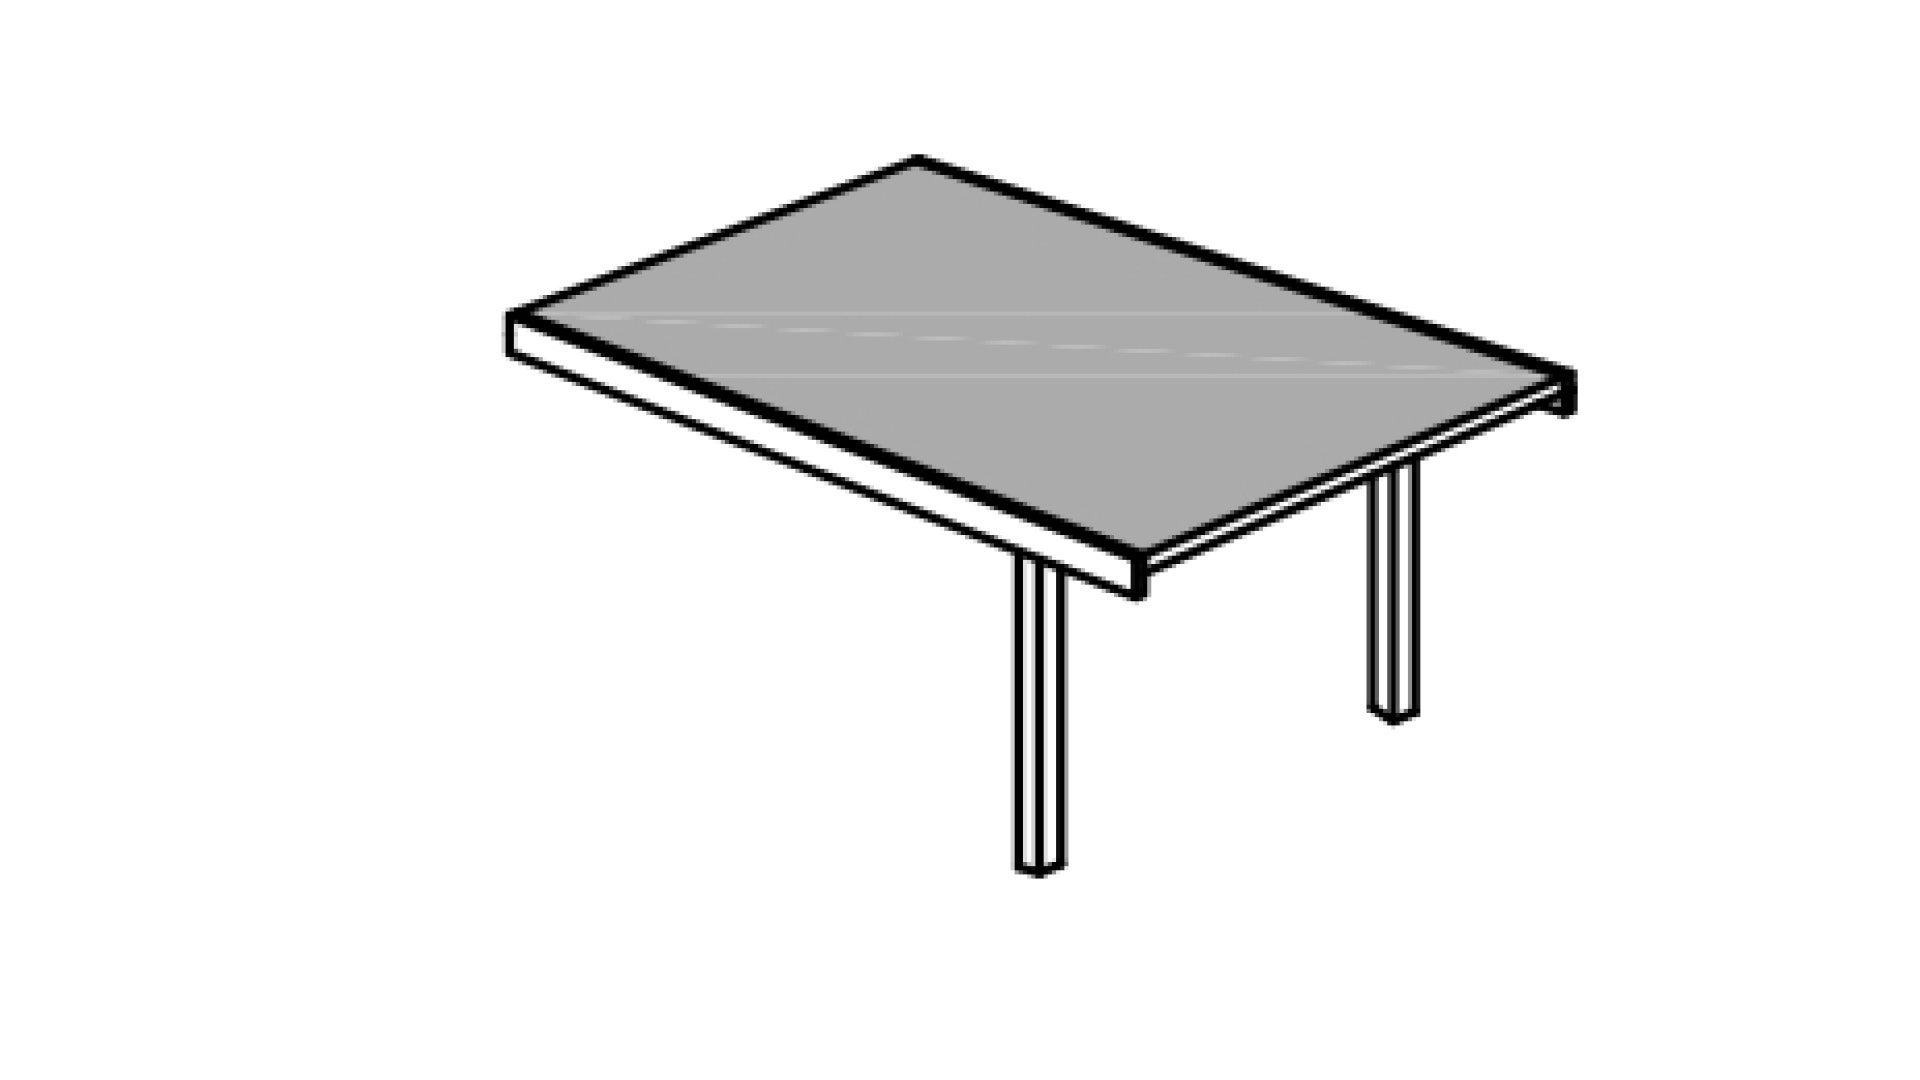 |
|
|
|
Marquee 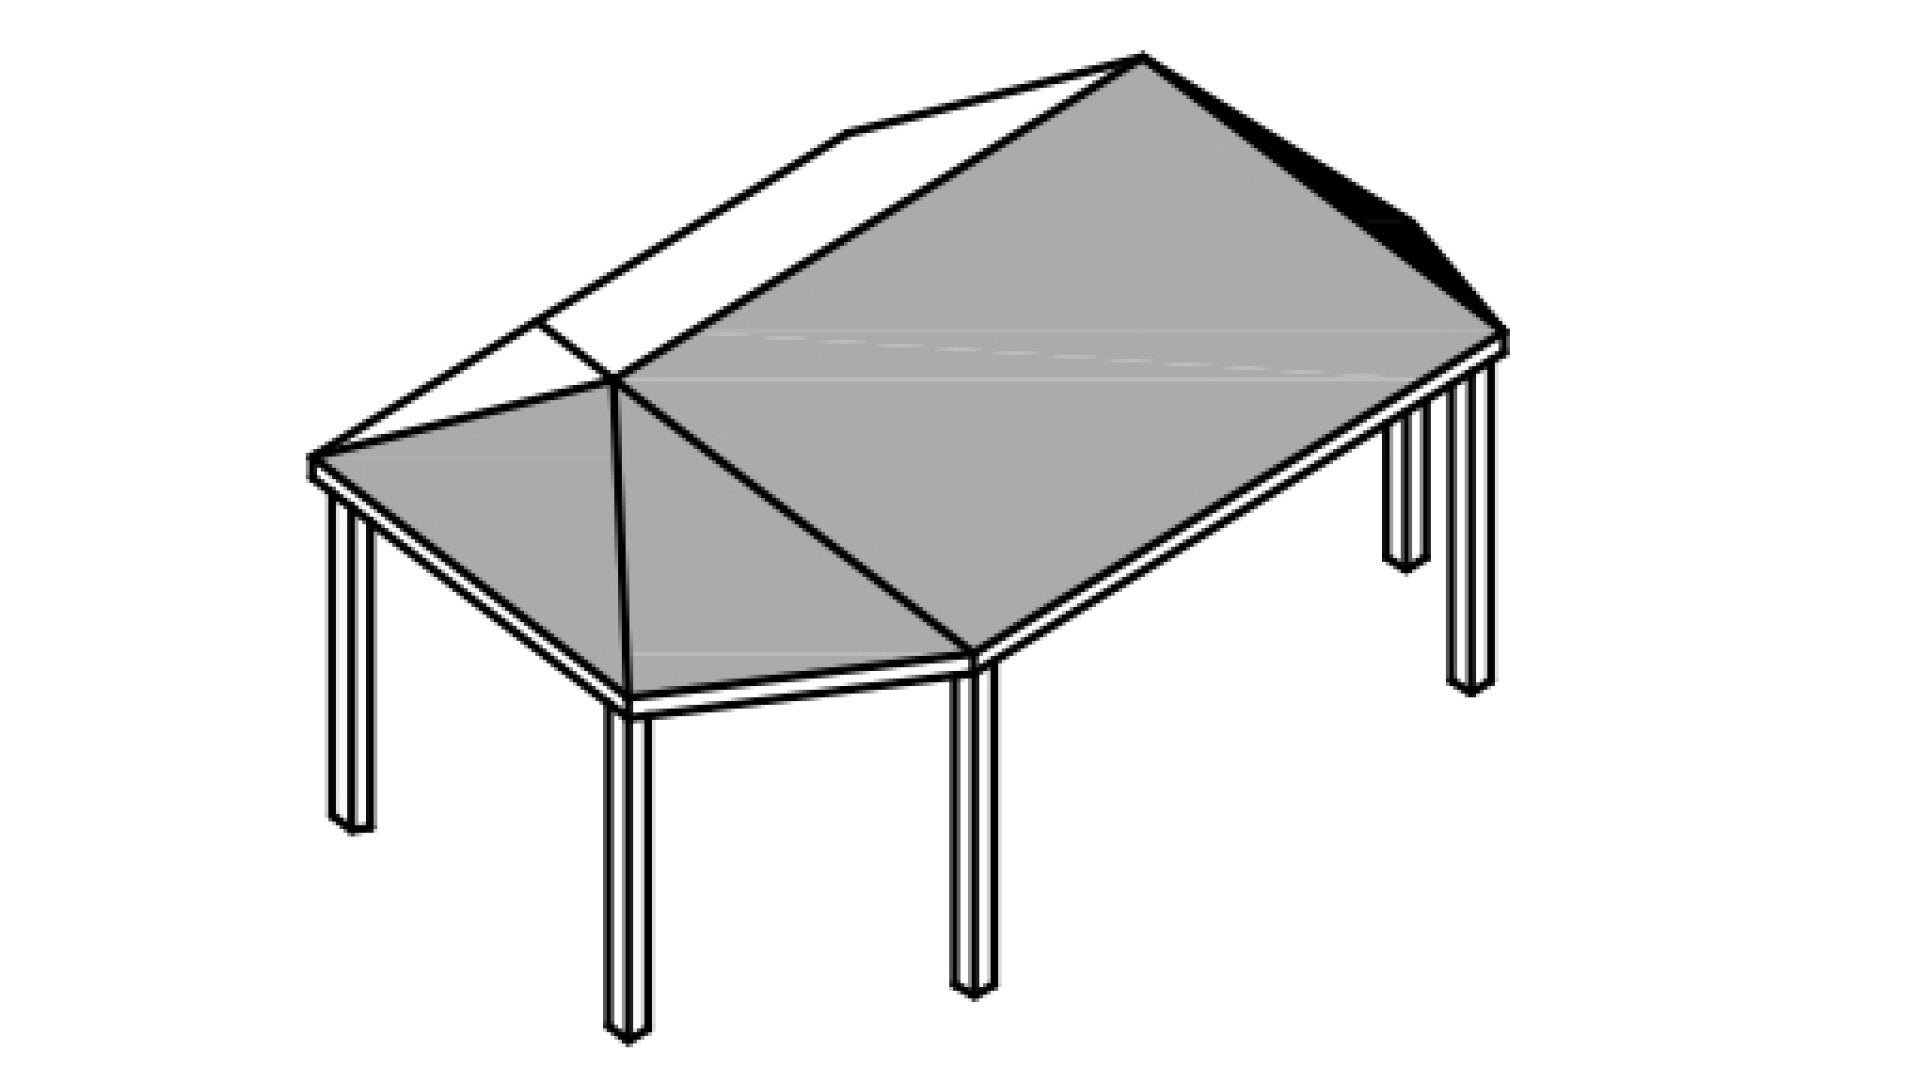 |
|
|
|
Guttering
Shelter with no guttering
Council prefers shelters with no guttering for local parks and environmental reserves.

- Leaf litter buildup in heavily vegetated sites can block downpipes and guttering, requiring ongoing maintenance.
- Where a shelter has no guttering, roofing must be designed to drain onto an extended slab, and not on or near a footpath. The concrete slab must be extended a minimum of 500 mm beyond the lower side(s) of shelter roof (dependent on roof style) to prevent scouring of adjacent areas.
- Slab extension treatments should consider the possibility of creating slip hazards through pooling water and algae growth.
- Rainwater sheeting off a shelter and falling directly onto natural turf, soil, sand or planted area can lead to erosion which may undermine the slab, causing subsidence.
Shelter with guttering and downpipes
Guttering may be utilised in other open space areas where appropriate, specifically to redirect roof water flow.
- Where installed, guttering is to match roof sheeting material.

- Quad or "D" guttering is preferred to box guttering. Box guttering has two points of exit for water flow, i.e. either side, and it has a tendency to backflow into the structure during high volume rain events, causing moisture damage.
- All guttering is to be installed with suitable fall to the outlet to minimise ponding.
- Gutter hangers must be coastal hardy material, i.e. stainless steel or aluminium.
- Gutter guard (matched to roof colour) must be used to minimise leaf litter build-up. Must be robust, coastal hardy and suitable for open space environment. Plastic is NOT to be used.

- Downpipes from a roof must be discharged appropriately. Downpipe to drainage grate (provide 100 mm clearance for maintenance access).
- Where there is a potential for vandalism, protective shrouds shall be installed around downpipes. Spiral welded, stainless steel downpipes with a 2-3 mm nominal wall thickness may be used.
- Avoid discharging water directly on to a concrete surface, as this can result in a slip hazard.
See Table 2: Gutter applications for shelter roofing.
Table 2: Gutter applications for shelter roofing
Gutter type | Recommended use/application | Key considerations |
Gable roll  |
|
|
Quad or "D" gutter 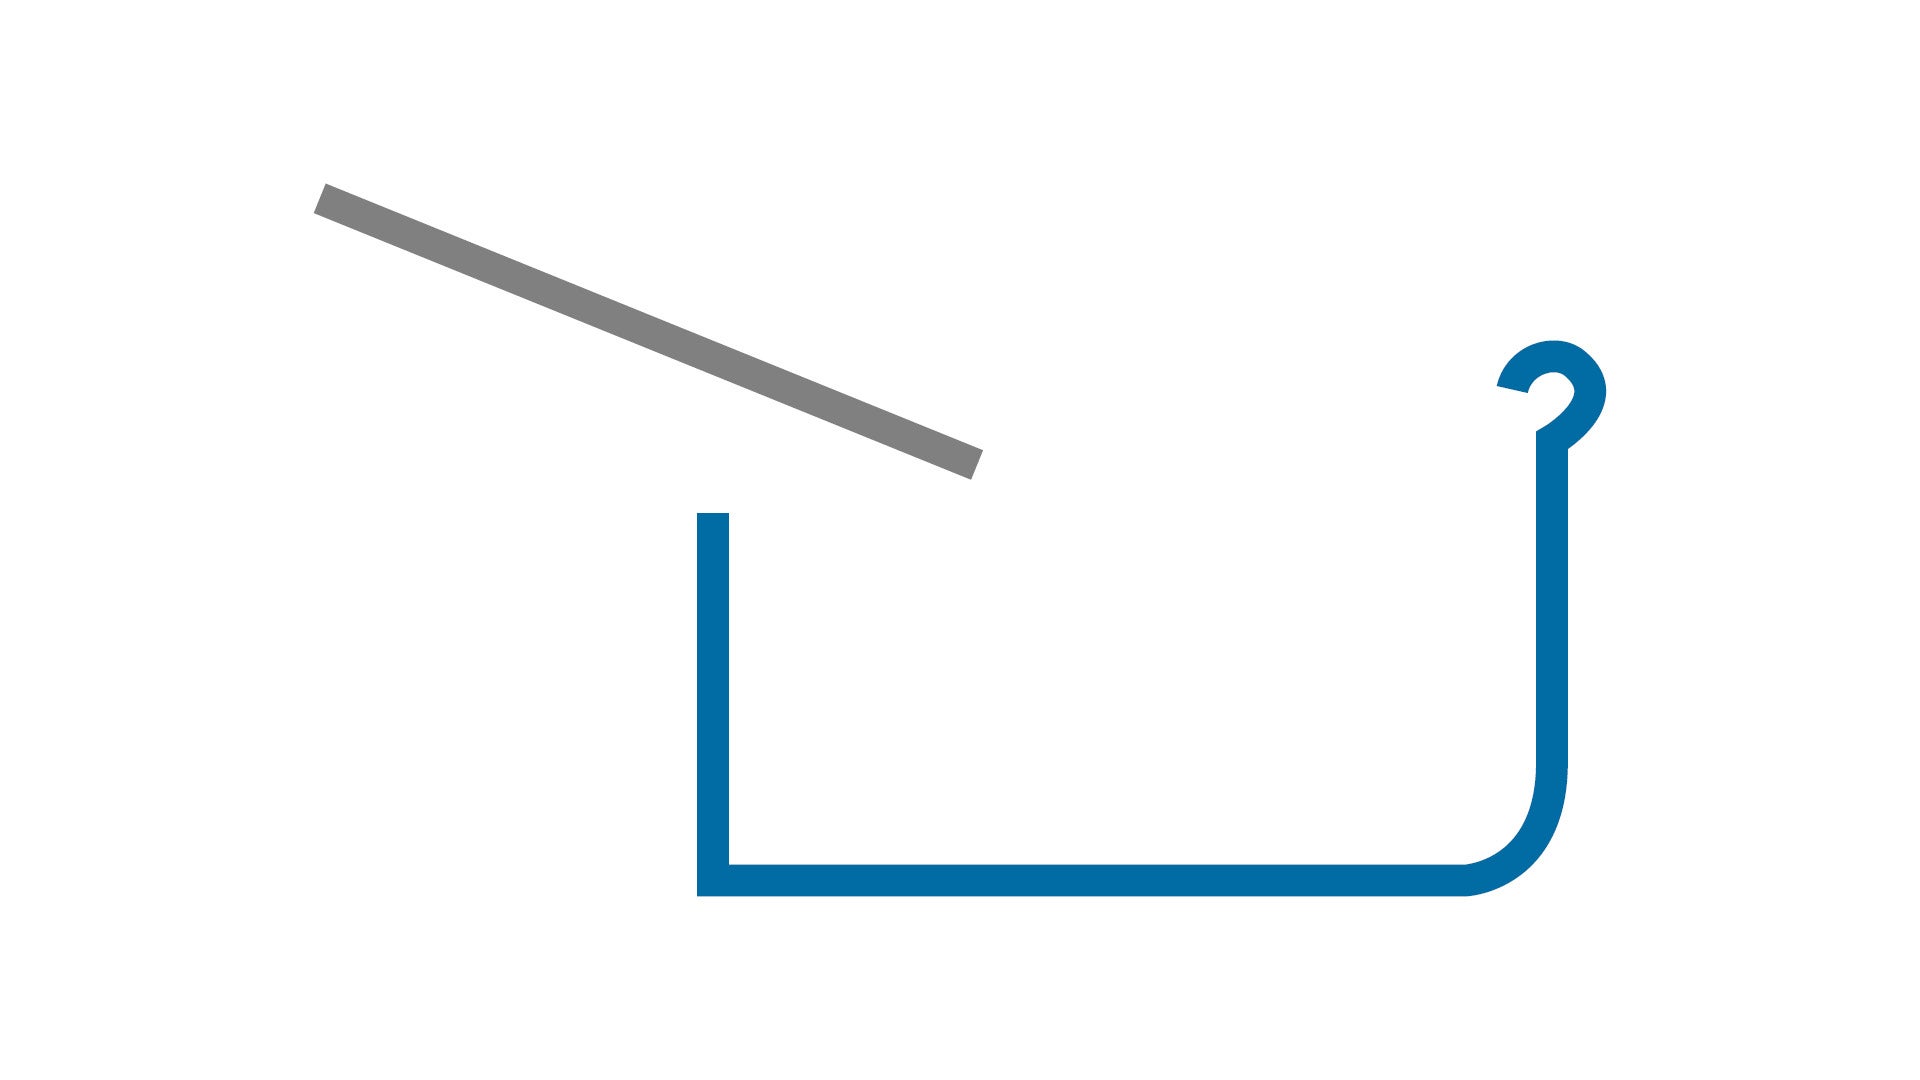 |
|
|
Squareline gutter 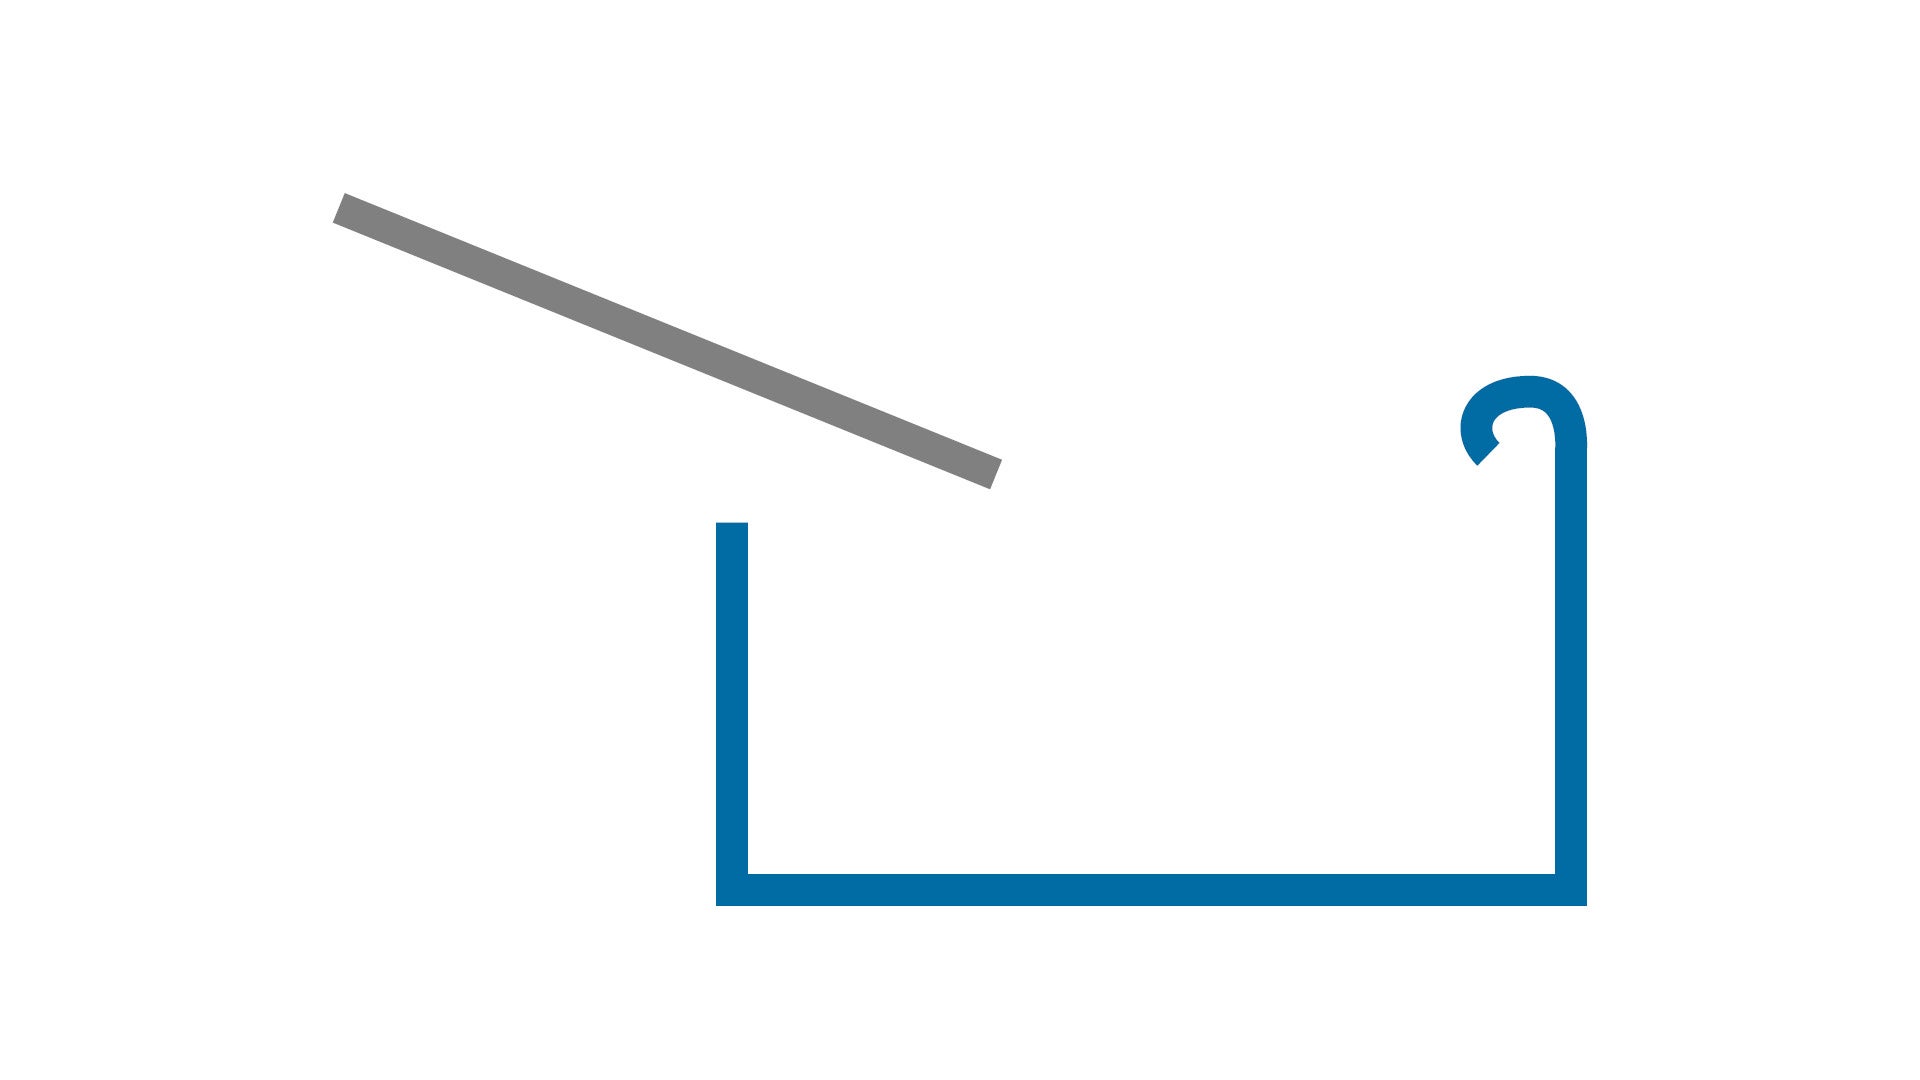 |
|
|
Half round gutter  |
|
|
Box gutter 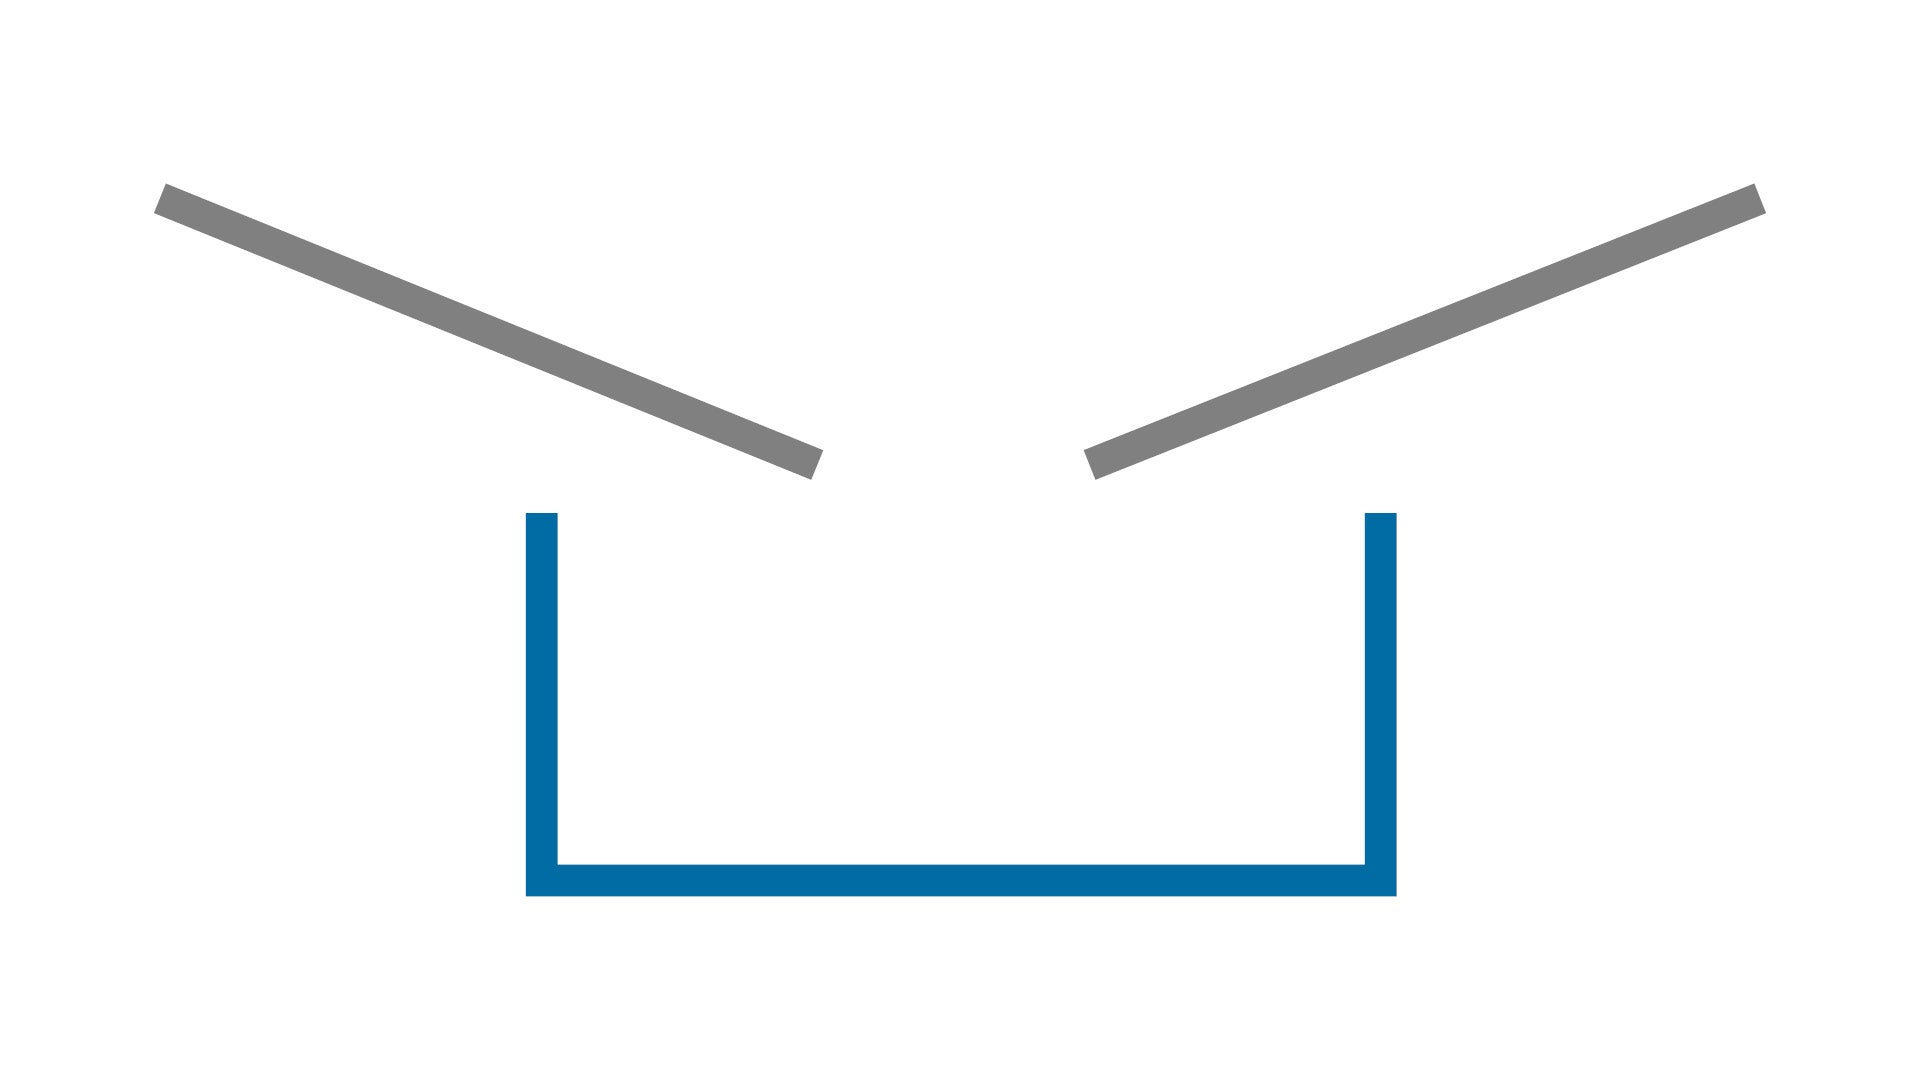 |
|
|
Heritage gutter 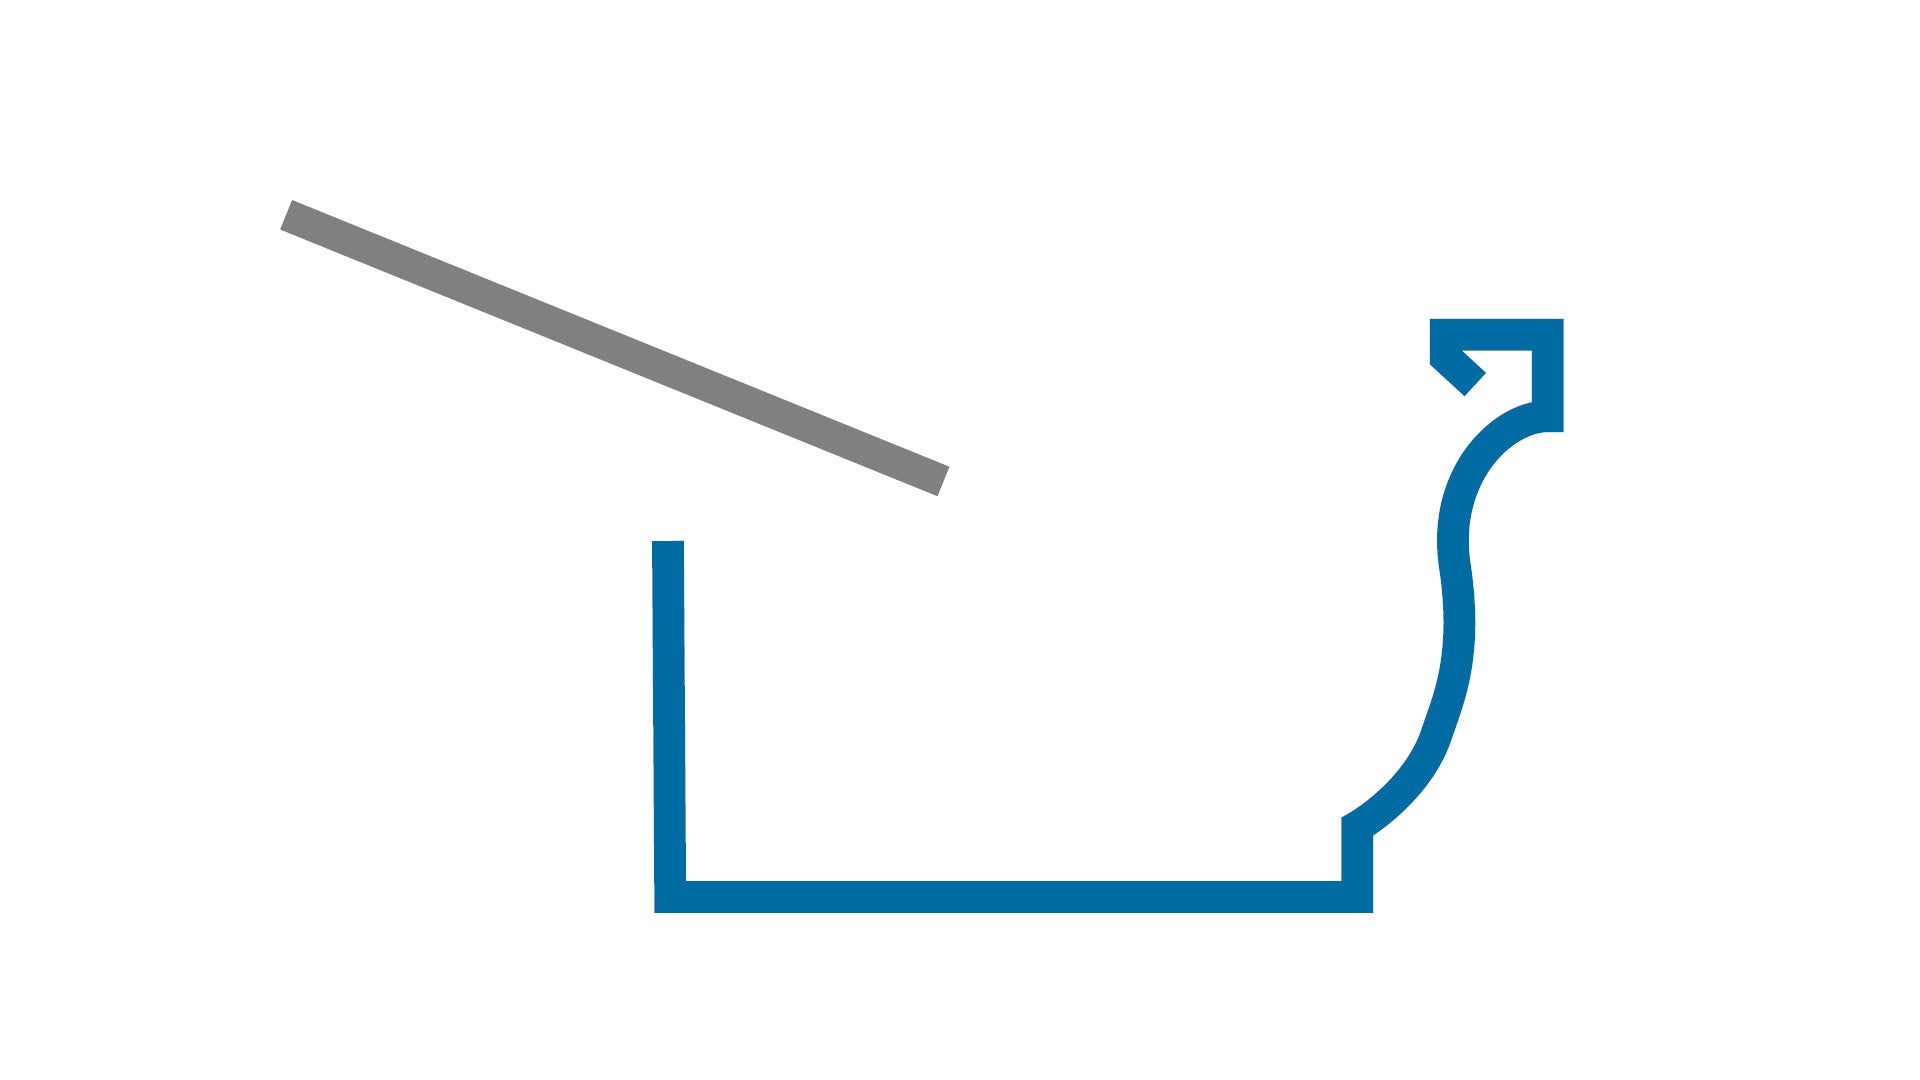 |
|
|
Structural elements
Post anchors
Post anchors/stirrups must be engineered in accordance with the relevant Australian standards.
Where replacement of the structure or any component is required, anchors enable removal of posts without damage to the concrete.
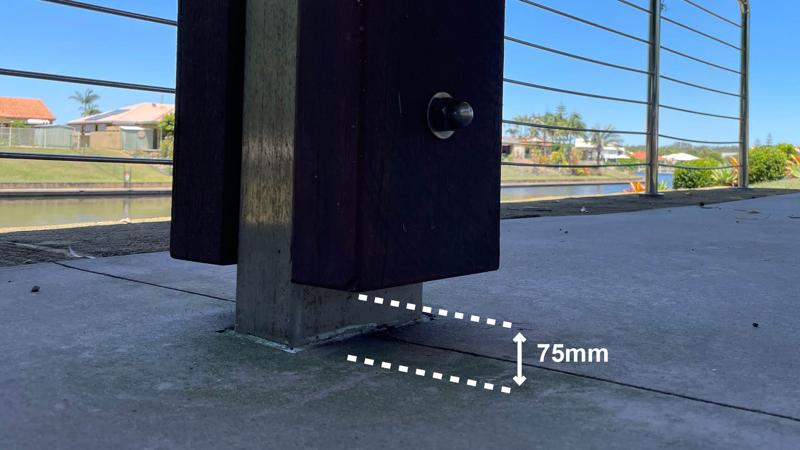
- Timber posts are to be secured by post anchor embedded in concrete. This will elevate the timber above the ground (minimum 75 mm above a concrete slab) to aid drainage and to prevent the occurrence of wet rot.
- Post anchors also provide the required gap to identify and protect the structure from termite infestation.
- Design Capacity of the post anchor must be certified for the maximum 'limit state design' load which the anchor can safely support under the specified load condition.
- Post anchor materials:
- East of the Bruce Highway, 316 marine grade stainless steel is preferred.
- West of the Bruce Highway, 316 or 304 marine grade stainless steel or hot dipped galvanised steel may be used.
- Dog off-leash parks (particularly fenced) - 316 or 304 stainless steel post anchors must be used. Galvanised steel is not the preferred material for anchors at the base of post legs, as dog urine has been found to corrode the galvanised steel.
- Posts (both timber and steel) must not be embedded into walls, as this prevents maintenance access. Anchors or base plates (or similar) must be used to maintain separation from the wall.
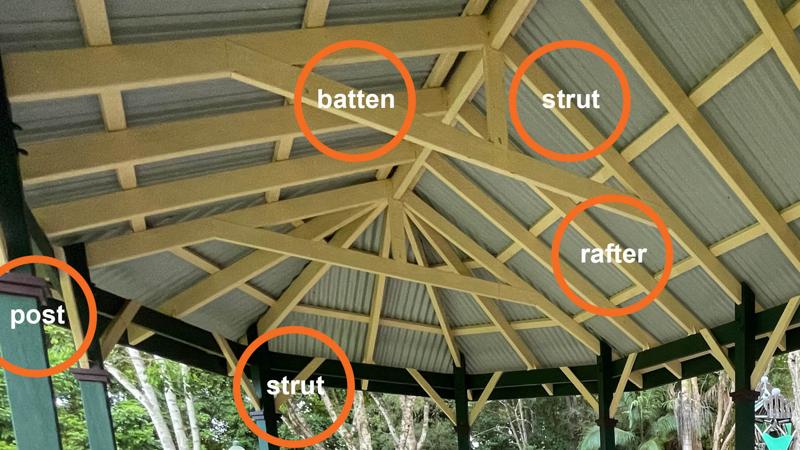
Posts, beams, struts, rafters and battens
- To prevent termite infestation and the occurrence of rot, timber is not to be used in direct contact with the ground surface. All timber posts are to be set into options such as post anchors, 'shoe' fixings, blades with timber on either side.
- It is not preferred that steel posts are embedded directly into walls as this allows water ingress and rust development. In these situations, post replacement requires dismantling of the wall.
- Rough sawn timber may be used, as it has improved durability.
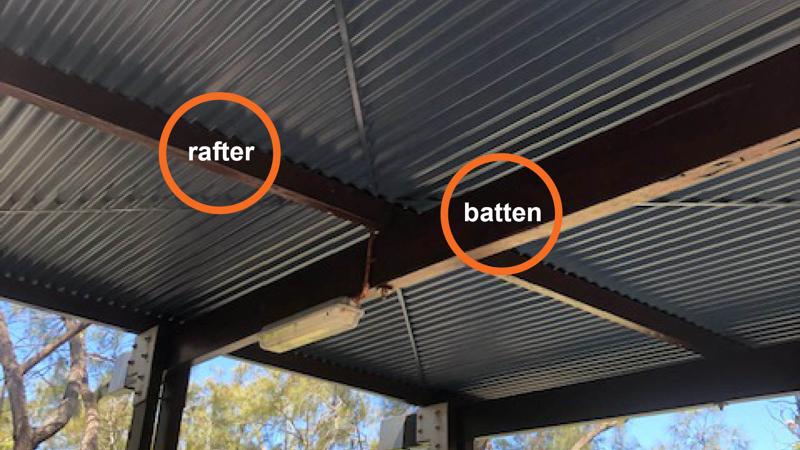
- All rafters must be full length with no joins.
- Timber must be pre-drilled for fastening where appropriate to prevent splitting and to make allowance for shrinkage.
- Timber insets may be incorporated within metal posts for a customised finish.
- Limit timber protrusions outside of a shelter roofline. Install stainless steel caps over any timber protrusions to prevent water damage.
- All timber in contact with roof sheeting must be sealed to minimise corrosion and prevent warranty being voided.
- All timber battens and shade slats (both structural and decorative) must allow for maintenance access to any other components of the shelter without requiring batten/slat removal.
See Table 3: Timber grading for further guidance:
Table 3: Timber grading
Timber term/grade | Description | Grading system | Minimum Council requirements |
'F' grade
|
| The grades are:
| Minimum grade F14 for outside of a covered area, e.g. shelter posts. |
Durability class
|
| Natural durability class
Class 1 - Highly durable
Class 2 - durable
Class 3 - moderately durable
Class 4 - non-durable
|
|
Timber hazard levels (treatment levels)
Guidelines providing information as to which type of treatment is suitable for which purpose.
|
|
|
|
Strength groups
Timber species graded for structural purposes are classified into strength groups |
|
|
|
Bracing
Permanent bracing in shelter construction is intended to resist forces from gravity, wind, seismic and other forces, as specified by a structural engineer.
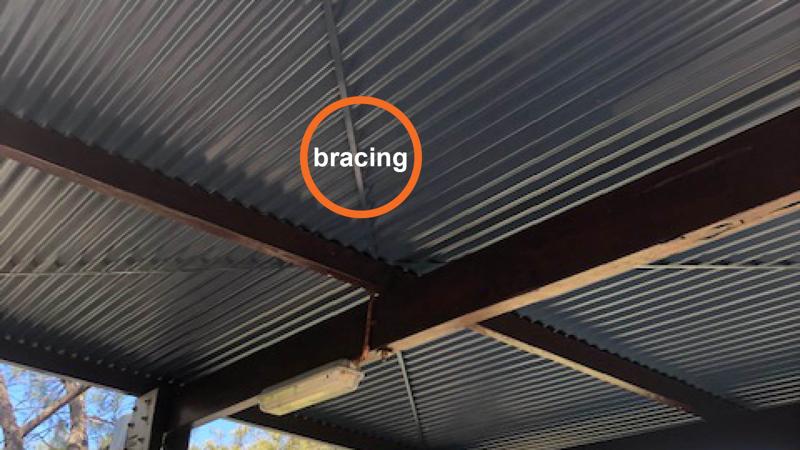
- 316 stainless steel strap bracing is typically used for cross-bracing roof trusses.
- Ensure bracing is separated from roof sheeting to prevent galvanic corrosion
- Bracing is to comply with the relevant Australian Standards.
Shrouds
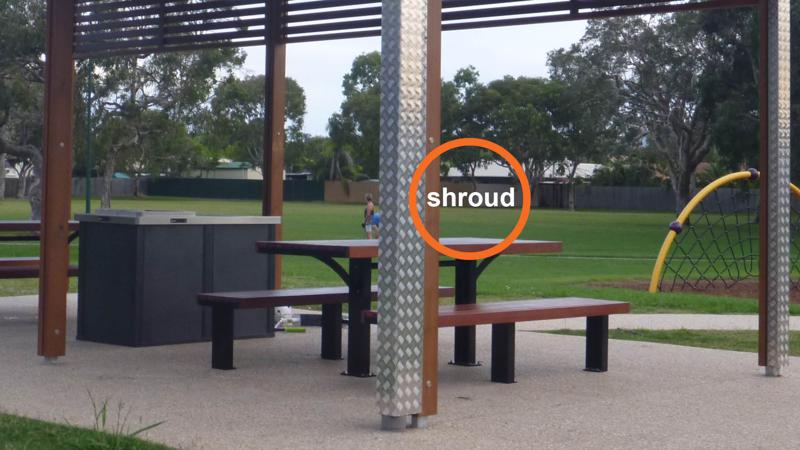
Electrical - shrouds over electrical conduit are to be aluminium or stainless steel with simple, anti-vandal fixings. It is preferred that electrical conduit is recessed within the structure.
Downpipes - where there is a potential for vandalism, 2.0-3.0 mm stainless steel wall plate (shroud) shall be installed around downpipes.
Where hand painting of shrouds is required, this should occur before installation, to minimise damage.
Alternative design solutions that achieve the same protection may be utilised (i.e. concealed services within the structure, whilst still providing maintenance access).
Fixings and fasteners
Fixings and fasteners used in shelter construction must be in accordance with the relevant Australian Standards:
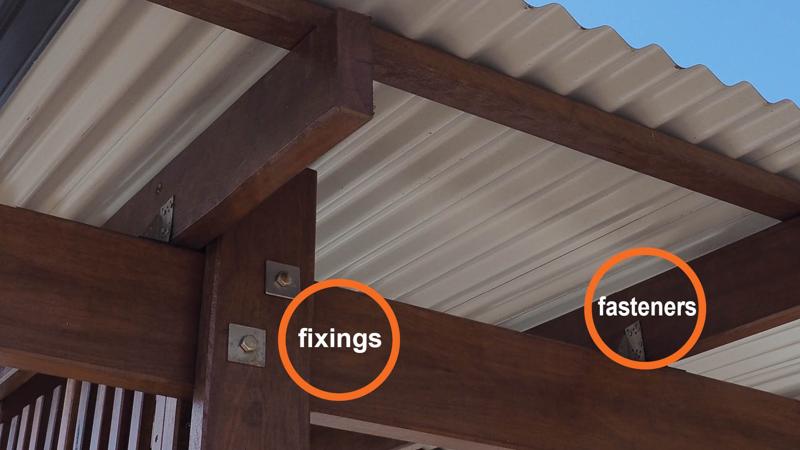
- All plates, washers, bolts, rods, angles, roof bracing, straps and any other steelwork is to be marine grade 316 stainless steel. Stainless steel roofing may require specific fasteners to minimise corrosion.
- Using 316 marine garde SS fixings and fasteners eliminates the ongoing regular maintenance requirements to remove and regrease components.
- 316 marine grade SS will not rust and expand, minimising the need to upsize bolts for replacement
- Fixings are to include flat washers, spring washers and nuts, secured with thread lock compound (suitable for removal by hand tools). This will prevent loosening of nuts and loss of structural integrity, while allowing for replacement of parts.
- Nyloc nuts (or equivalent) are a type of lock nut which contains a nylon collar insert that resists turning. These are preferred to prevent release or loosening of thread joints due to vibration, corrosion or temperature fluctuations.
- All bolts must have a suitable grade of thread lock compound applied to prevent bolts working their way loose
- Dyna bolts must be installed and tightened to manufacturers recommendations to ensure they do not work loose.
- No exposed thread or rod is permitted. Excess bolt protrusion is to be covered or cut back flush to nut to avoid personal injury.
- Metal brackets are to be flush and free of sharp protruding edges, to avoid injury to shelter users.
- All fixings (fasteners) are to be checked for tightness prior to handover, and re-tightened where required.
Galvanic corrosion
Galvanic corrosion can occur when two dissimilar metals are in contact with each other.
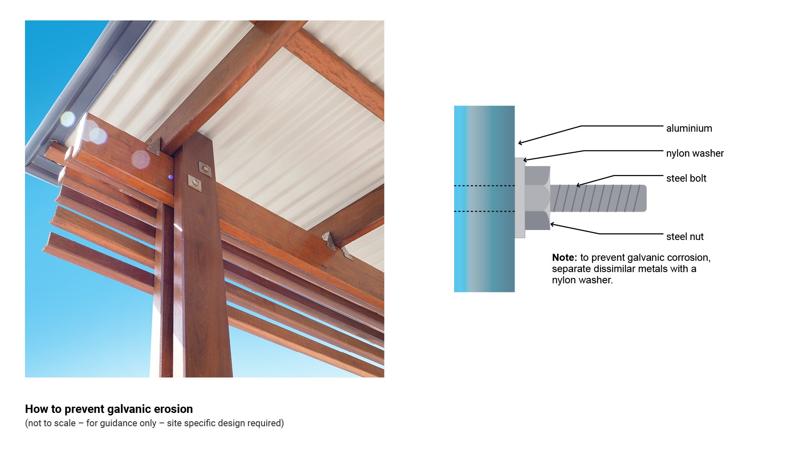
- For example, this may result in a white powdery film that forms on the surface of an aluminium part where it contacts a steel part. This generally bubbles the paint and deteriorates the aluminium.
- To avoid cross contamination of metals, fixings are to match the metal being fixed to, alternatively use neoprene or nylon washers or corrosion protection tape to separate the different metals.
Concrete slab and footings
Reinforced concrete is composed of concrete and an embedded material, generally steel reinforcing bars. The steel strengthens the concrete, enabling it to resist tensile stresses that can cause cracking. Foundations and slabs on ground can be constructed by:
- Reinforced concrete poured into formwork directly on the prepared ground surface.
- Reinforced concrete poured directly into the ground in pre-excavated trenches.
Concrete slab
Construct a shelter base slab in accordance with the following:
- Minimum crossfall of 1% or 1:100, so that water does not pool under the shelter in a rain event.
- Grade slab away from pathways to avoid water pooling on, or flowing across a path and creating a slip hazard.
- To provide equal access, ensure that the finished slab level is flush with the surrounding surfaces. Turf to be flush to finished floor level of slab.
- Where finished surface levels differ, mobility devices and prams may be 'tramlined' and people who use wheelchairs may be in danger of tipping over.
- Concrete is to be underlain with an approved waterproof membrane to prevent shrinkage cracking.
- Where a shelter has no gutters, the concrete slab must extend a minimum 500 mm outside the shelter roofline (on the lowest edges of the roof), to prevent scouring of adjacent areas.
- To prevent wear and to provide increased access, concrete slab may be extended to 1000 mm (or greater) beyond roofline.
- Consider drainage (based on soil type) to ensure slab does not create standing wet areas.

- Broom finish is the preferred finish for concrete slabs under shelters (fine finish is preferred, but slip resistance must be achieved). Exposed aggregate and honed finishes are not preferred, as they have been found to be less hygienic as they accumulate dirt, grease and grime.
Optional shelter components
Shade slats
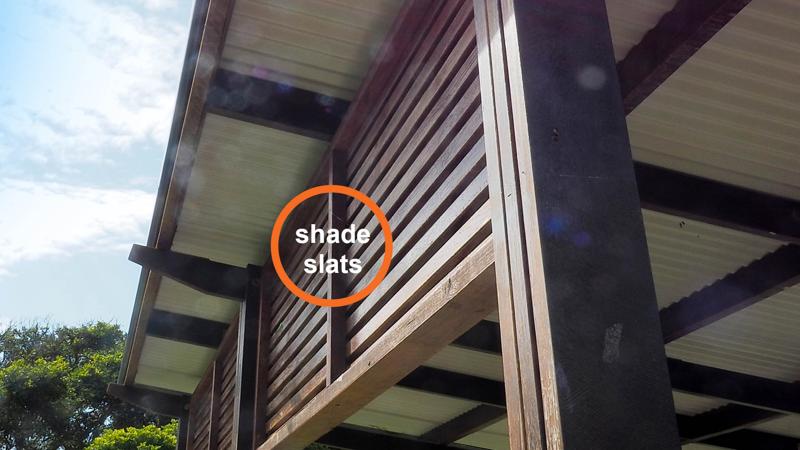
Shade slats may comprise part of a standard kit shelter or they may be incorporated to provide a custom finish to a shelter, in addition to providing extra sun and weather protection. The shade slats should be designed to minimise maintenance, e.g. full panel shade protection, material selection to reduce painting and preparation time.
- Shade slats can be steel, aluminium or timber
- Timber slats are not to be checked in too deeply, as they may be easily broken, requiring replacement or repair.
- Select larger sized timber slats to minimise sun entering the shelter Considerations should be made to minimise excess sun filtering through the shade slats.
- Shade slats are to be a minimum of 2.1 m above the finished floor covering, as per the latest edition of the National Construction Code.
Lighting
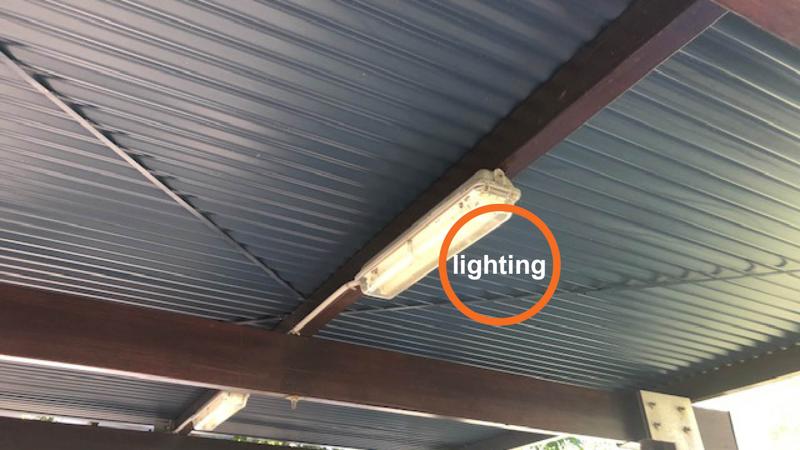
Lighting design may be included where required and appropriate. Consider the following:
- All lighting designs are to be supplied with a Compliance Certificate for Building Design or Specification (Form 15) signed by an RPEQ indicating the design criteria.
- Lighting infrastructure must be installed to ensure no interference with known turtle nesting areas.
- Install photoelectric (PE) cell and time clock to ensure lighting cannot remain operational during daylight hours or can be switched off at certain times of night.
- Anti-vandal guards are to be fitted over lighting fixtures, where appropriate.
- Shrouds are to be installed to protect electrical conduits. Conduits may be recessed within structure where appropriate.
See LIM Electrical for further guidance.
Smart technology
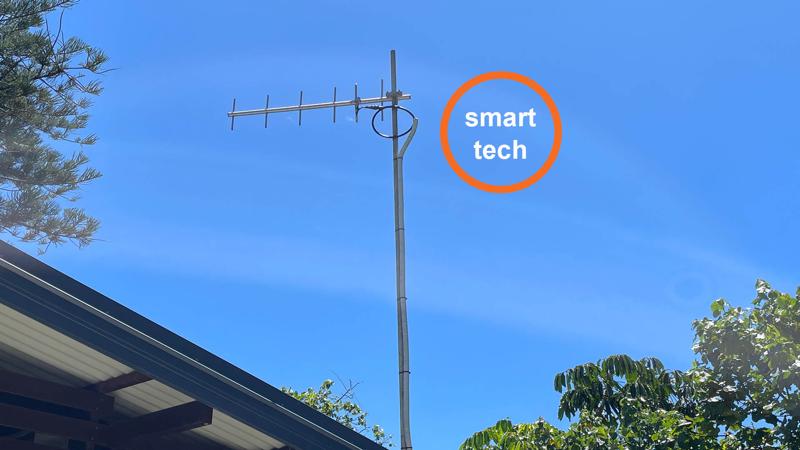
Shelters may incorporate smart infrastructure, such as, motion sensors (for lighting and people counting), loT gateways (for wireless connectivity) and other sensors and devices such as rain sensors etc, where appropriate and when approved by asset custodian.
See LIM Smart technologies for further guidance, including key considerations for installation.
This component is currently in development