Shelters
Positioning
Best practice guidance for the placement and arrangement of embellishments
Site setout
Orientation
Wherever possible, the combination of natural and built shade should be considered as the most effective and sustainable outcomes for shade creation. This combination will allow the built structures to provide effective shade while the trees are growing, and/or allow for a greater coverage of shade area.
Consider the following elements:
- Position shelters on site to capitalise upon solar orientation and prevailing breezes. Design may need to consider protection from westerly sun and wind when required.
- Locate a shelter near play spaces and orient furniture to facilitate supervision.
- Group park items together to reduce visual clutter and provide cohesion to the landscape.
- A smooth transition is required between all pathways and adjoining concrete slabs to access associated embellishments.
Safety
Crime Prevention through Environmental Design (CPTED) principles apply.
Shelters with planting
Shelters in relation to trees and planting:
- Existing mature trees and new tree plantings, can provide additional natural shade.
- It is not recommended that shelters are constructed under mature trees as this can damage existing tree roots.
- Avoid locating shelters adjacent to plants with leaves with cutting edges, sharp thorns, spikes or poisonous parts.
- Avoid positioning shelters where existing or planted vegetation does, or will in future, obstruct views from the shelter. Rectification works may be environmentally sensitive.
- To minimise leaf litter and excess maintenance on shelter roofing, guttering and downpipes, consider mature tree canopy spread and prevailing wind direction.
- Consult an arborist for species and offset advice.
See LIM Planting (landscape) for further guidance.
Climate-based orientation
Design for appropriate climate-based orientation. Provide shade and allow for the penetration of breezes, sunlight and the integration of the shelter with the natural environment.
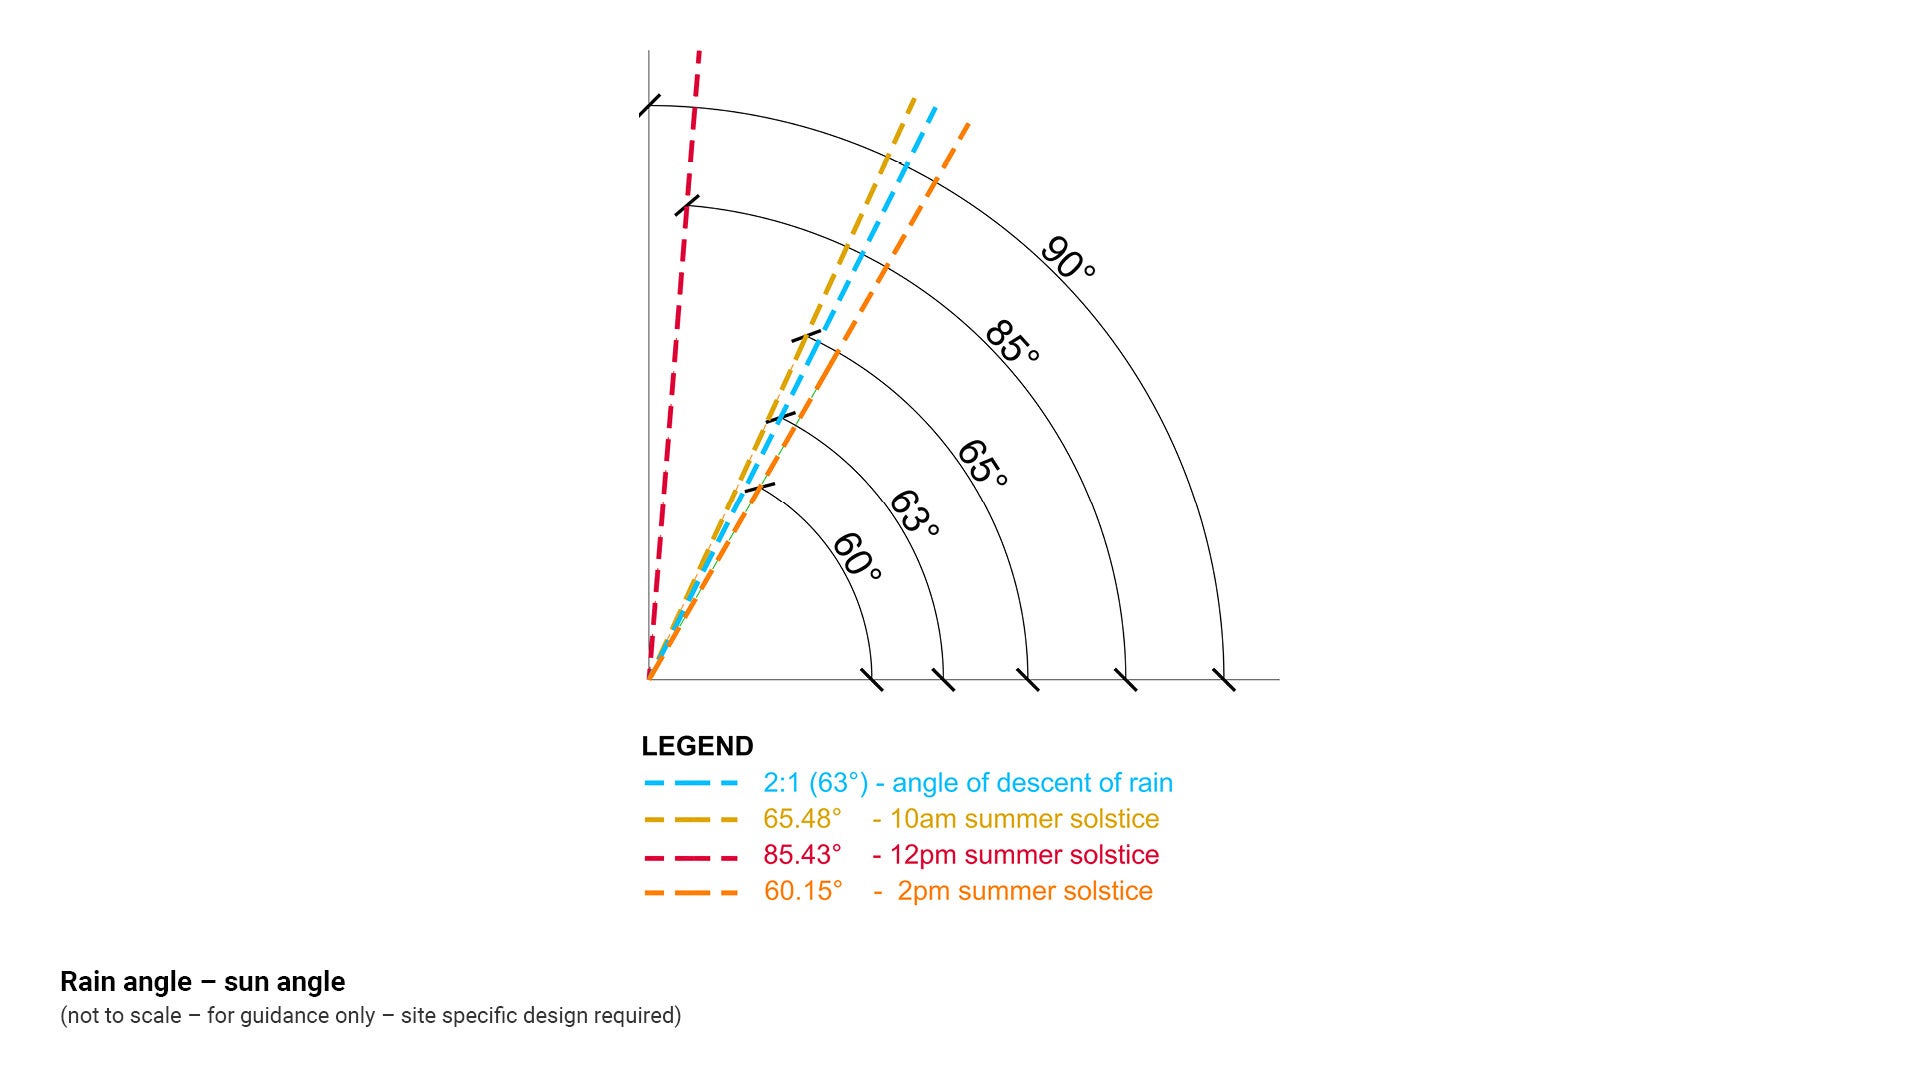
Note that the adopted rain angle allowance of 60° is a concession between 10 am - 2 pm shade cover (60.15° at summer solstice) and driving rain (63°).
The following ideal parameters for positioning a shelter should be considered, however all, may be modified to suit individual site requirements.
Rain/wind
- Consider the direction of sun/rain/wind and carefully locate shelters and furniture to reduce exposure. Rain on barbecues can collect in the fat trays, causing maintenance issues.
- Research shows that wind may cause rain to fall at considerable inclination. Resultant angles may be between 40 and 60 degrees (source: 'The Influence of the angle of incidence of the rainfall on the overland flow process'. Department of Land & Water Use, and Department of Hydraulics & Catchment Hydrology, Agricultural University Wageningen, The Netherlands).
- Consider the direction of prevailing winds, and orient shelters to provide natural protection where possible. This may be achieved by positioning the shelter alongside vegetation or other existing features.
- Increasing the overhang on more than one side of the shelter, should be considered where the roof is higher or the shelter is facing west. Prevailing winds may be stronger and therefore greater coverage is required to provide adequate protection.
- Shelter function can be adversely affected by wind driven rain, however rain protection is not the primary objective of a shelter.
- Furniture is to be offset a preferred minimum 1.2 m inside a shelter roofline (where possible).
See Figure 12: Rain angle – sun angle.
Figure 12: Rain angle – sun angle
Sun
- Minimise sunlight exposure between the high UVR period, 9 am and 3 pm (where possible). This is the primary objective for a shelter.
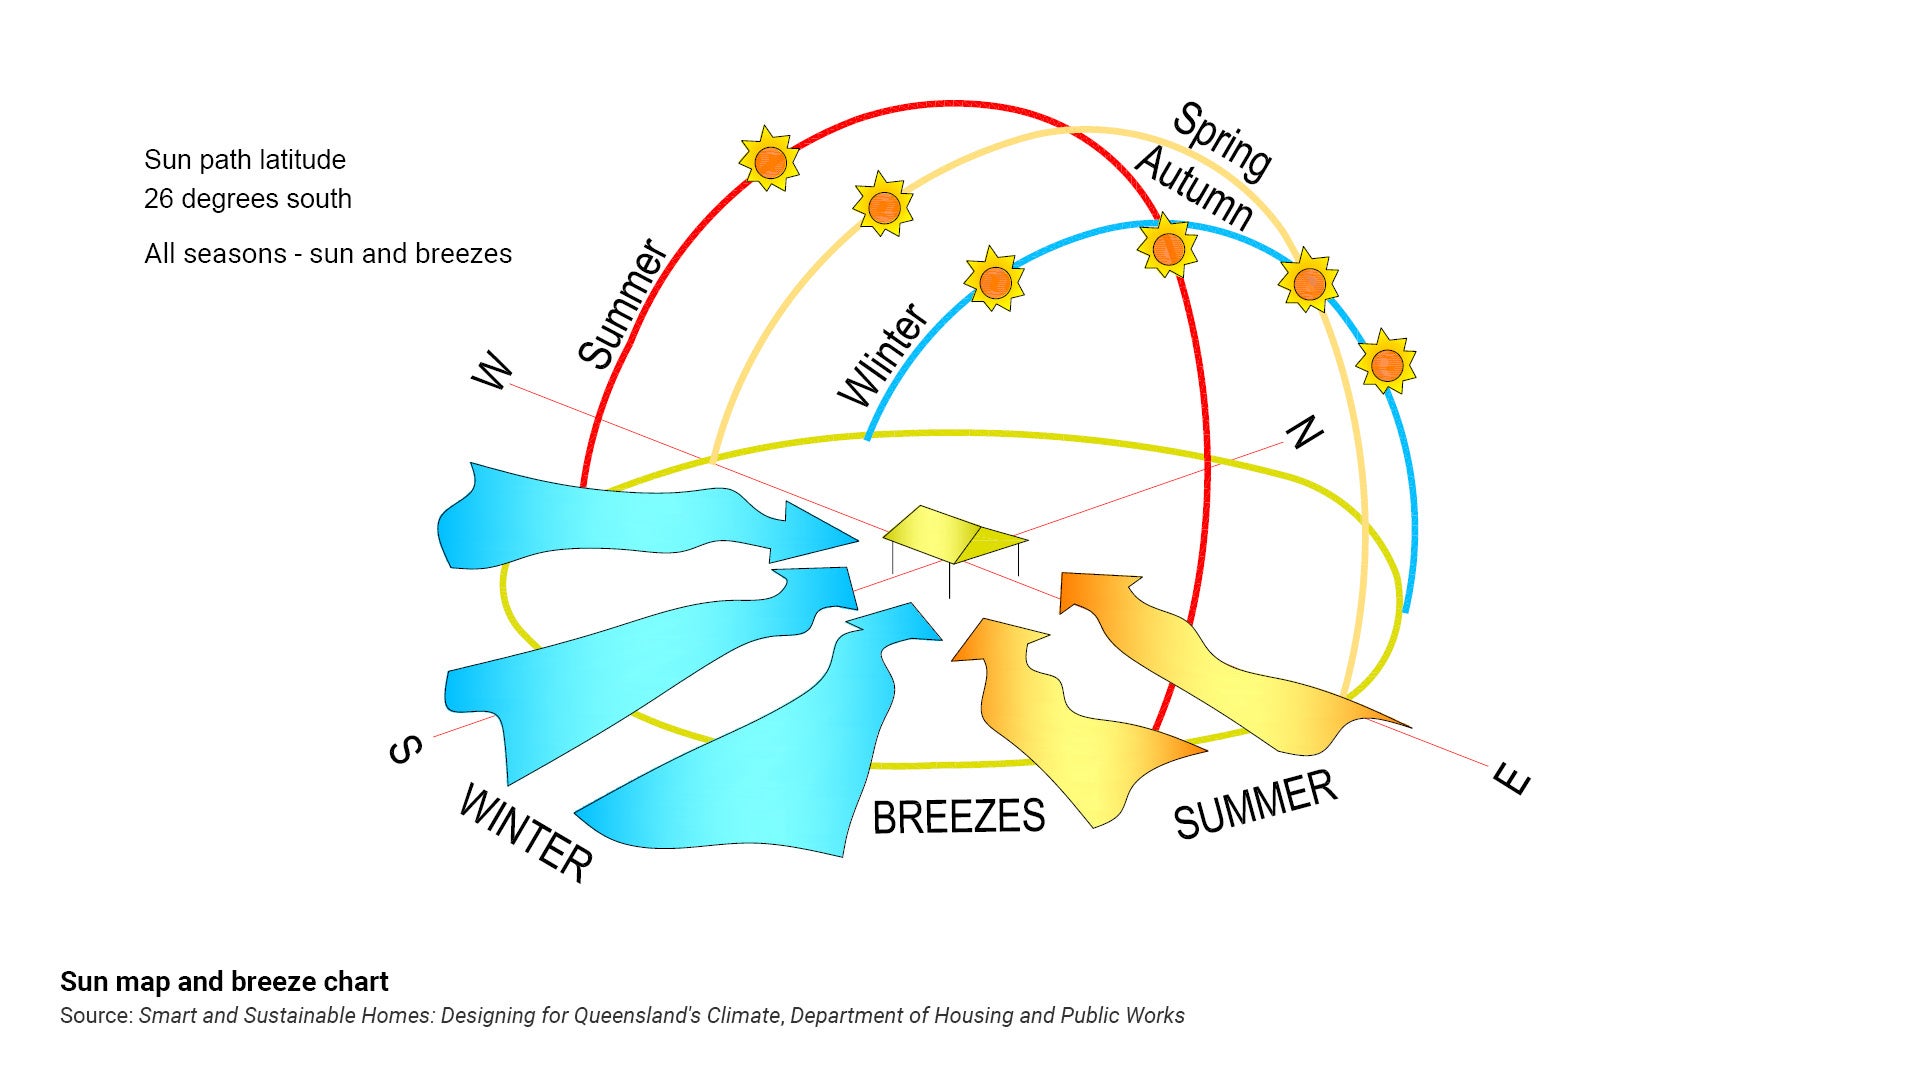
- Sun path latitude is 26° south.
- The LIM has adopted 60° angle of incidence of the sun's rays to design a fit for purpose shelter for the summer months.
- Add shade slats below a shelter roof to maximise summer sun/rain protection.
Viewlines
- Orient the furniture under a shelter to face towards views or activity areas for supervision.
- Where possible, the high side of a skillion roof should face towards desired views (for passive surveillance).
See the following:
- Figure 13: Skillion roof furniture offsets (indicative only)
- Figure 14: Pyramid roof furniture offsets (indicative only)
- Figure 15: Sun map and breeze chart.
Figure 13: Skillion roof furniture offsets (indicative only)
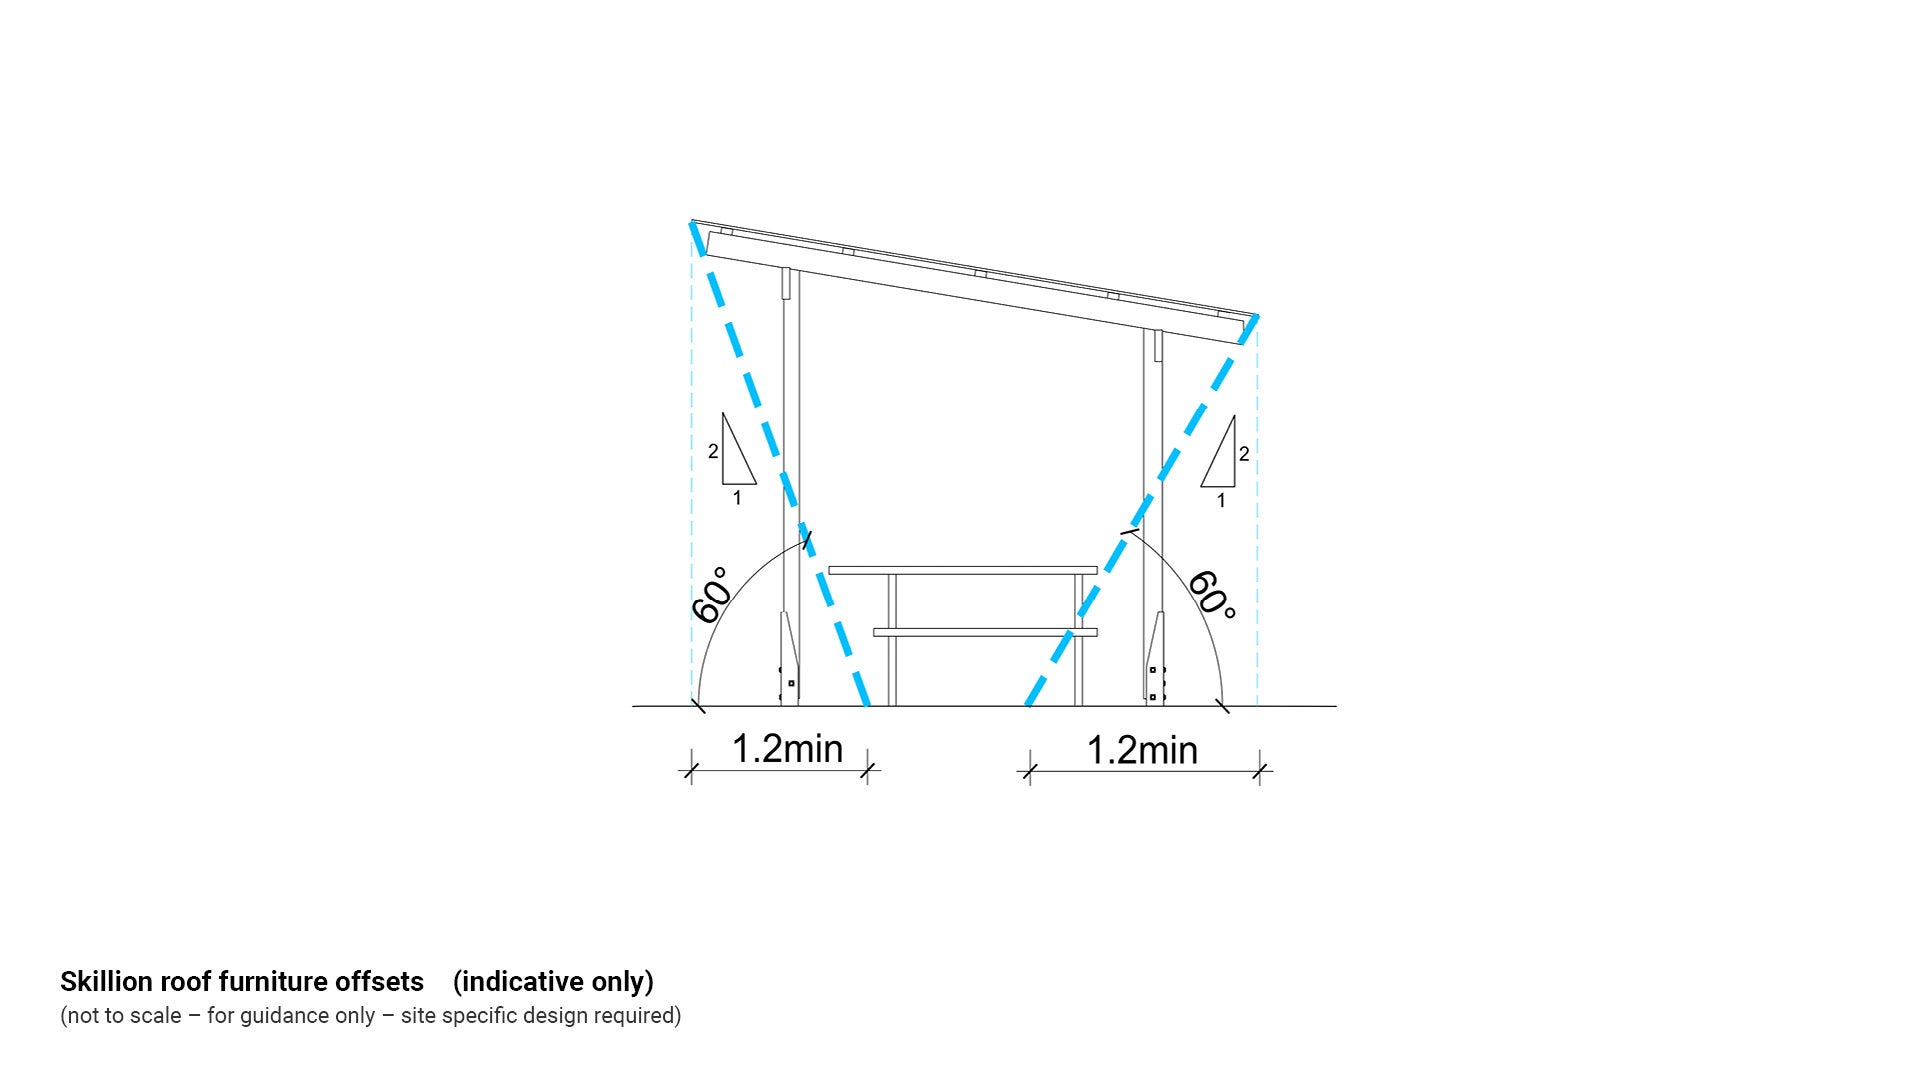
Figure 14: Pyramid roof furniture offsets (indicative only)
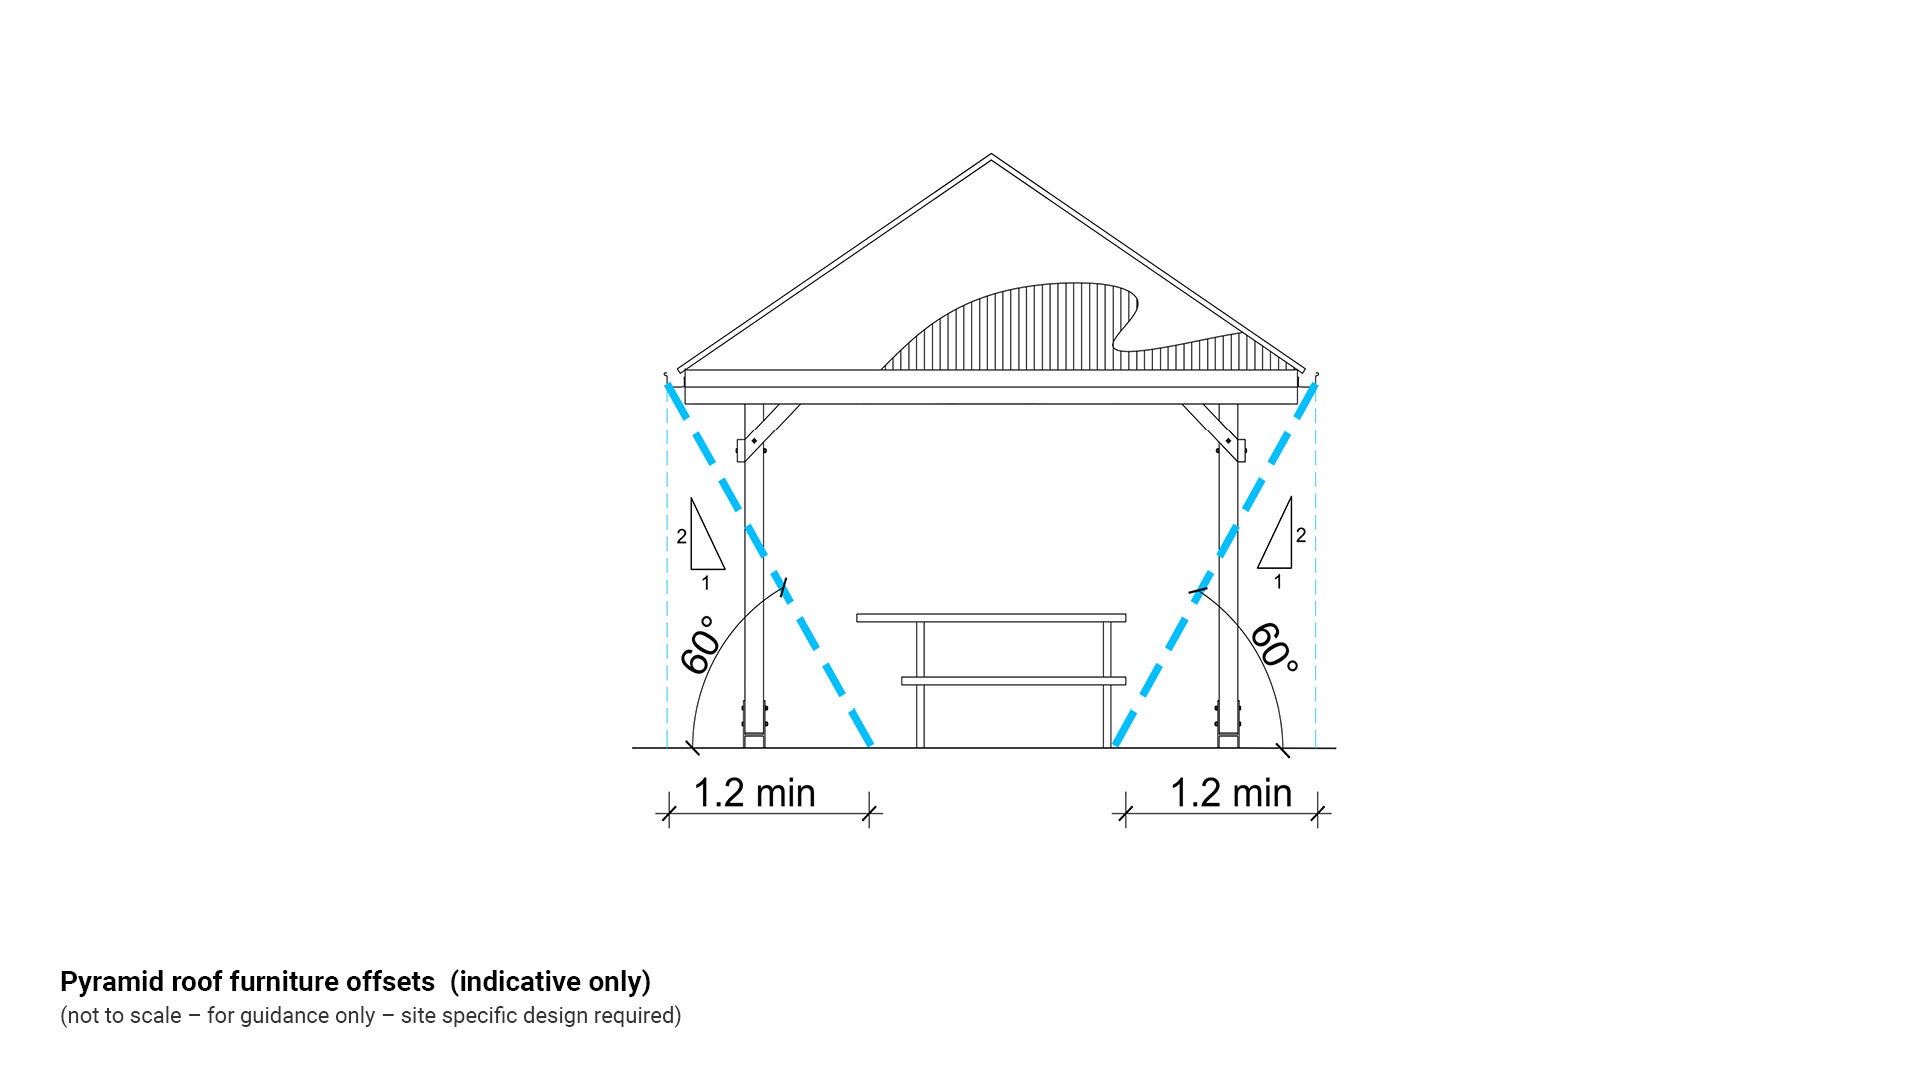
Figure 15: Sun map and breeze chart
Clearances
See the following for further guidance:
- Table 4: Positioning guidance offsets
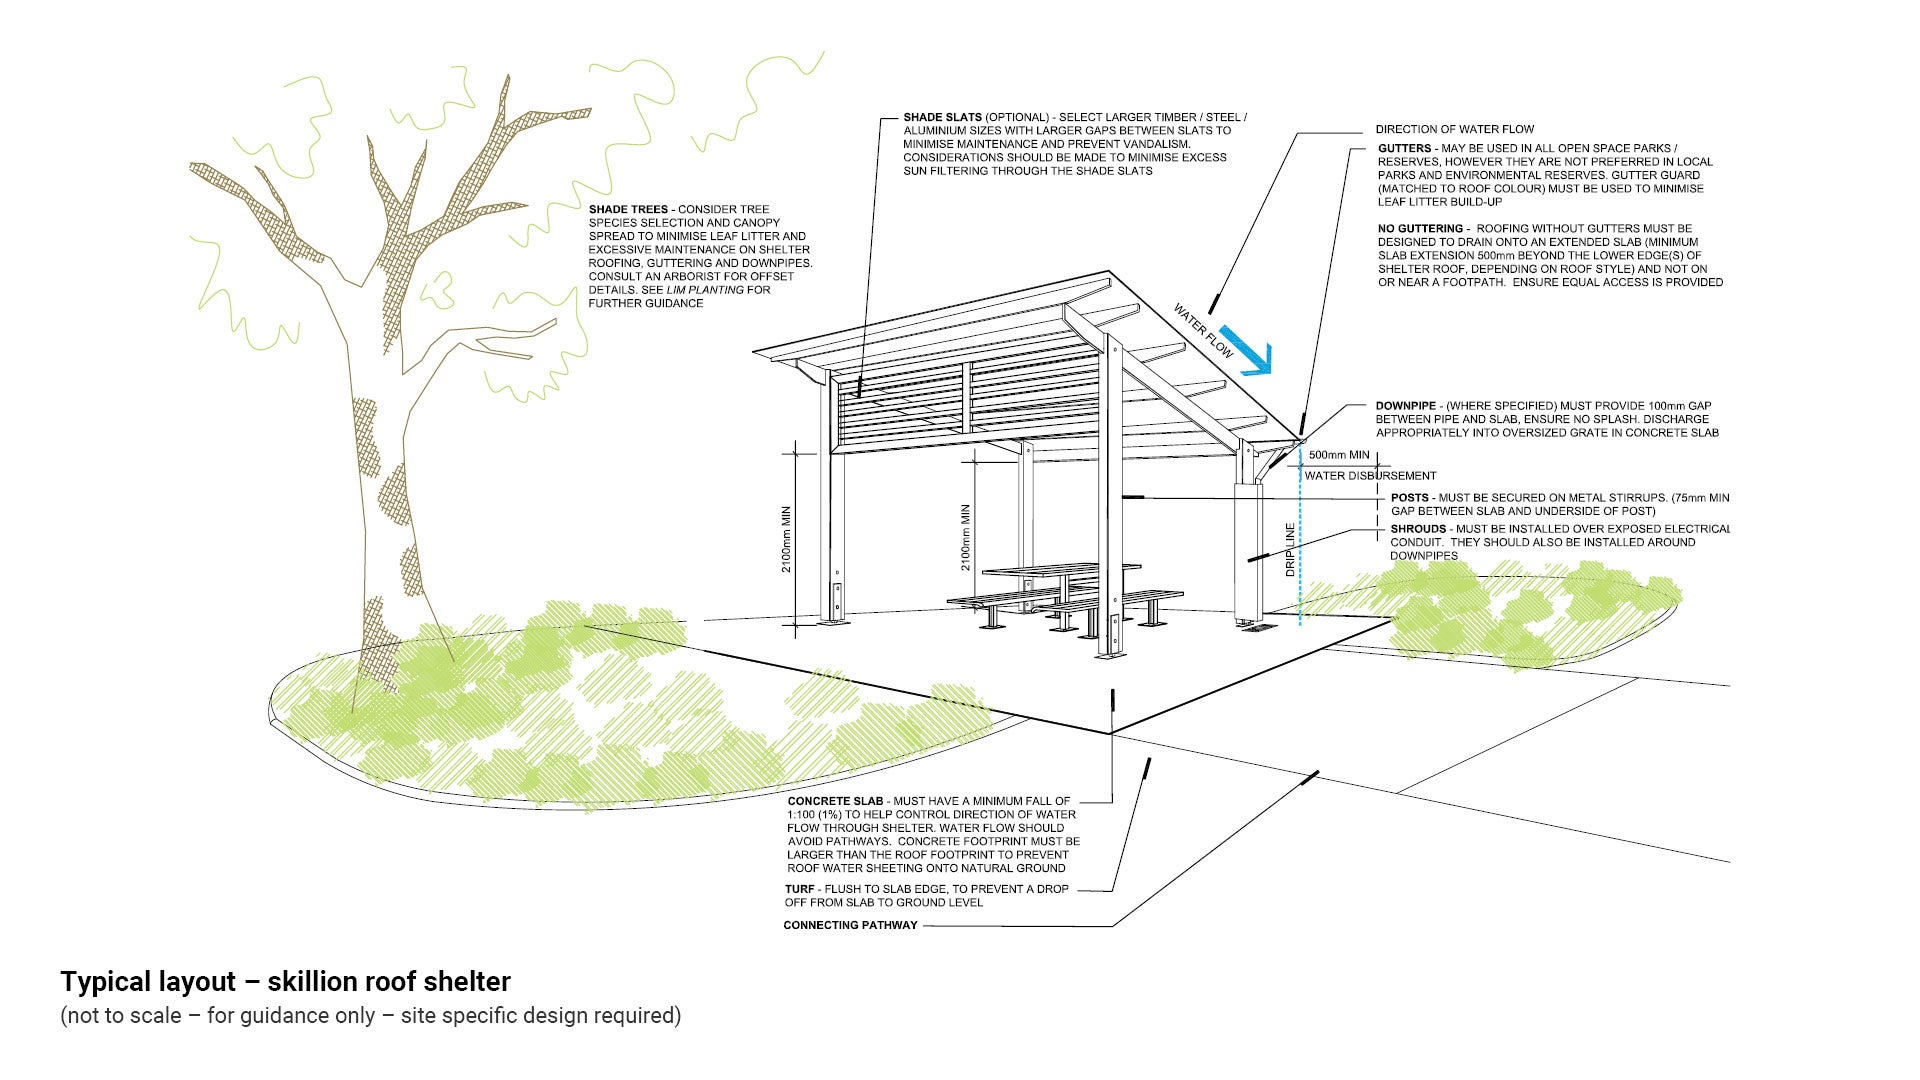
- Figure 16: Typical layout – skillion roof shelter.
Table 4: Positioning guidance offsets
Embellishment/component | Distance from | Minimum distance | Reason |
Shelter | Waste bin | 5.0 m (see LIM Bins) | To minimise odour impact on food preparation. For double bin installation, position waste bin closest to eating area and recycle bin furthest away to prevent contamination. |
Shelter | Recycle bin | 5.0 m (see LIM Bins) | To minimise odour impact on food preparation. For double bin installation, position waste bin closest to eating area and recycle bin furthest away to prevent contamination. |
Shelter | Outdoor ashtray | 5.0 m (see LIM Bins) | To minimise smoke and odour on food preparation. |
Shelter | Public access tap | As close as possible (in adjoining garden bed) | To allow users to wash food utensils and hands. Must not be attached to shelter post. |
Shelter | Clear area to any other embellishment | 2.5 m |
|
Roof edge | Edge of concrete slab | 500 mm min (from lowest side of unguttered shelter) | To prevent scouring, waterlogged areas and slab undermining. |
Timber post gap (anchor clearance) | Top of concrete slab | 75 mm min |
|
Under shelter furniture (seating, barbecues and tables) | Edge of roofline | Minimum 1.2 m offset to furniture |
|
Shelter posts | Furniture under shelter | 1.0 m | To facilitate stroller/wheelchair/mobility device manoeuvrability |
Figure 16: Typical layout – skillion roof shelter
This component is currently in development